

-
Products
Overview Products

-
2D Cutting
-
Tube Cutting
-
3D Cutting
-
Intelligent Welding
-
Intelligent Cutting Head
-
Industrial Automation
-
Industrial Software
-
Combination
-
Combination
BOCHU New Product -
Combination
BOCHU New Product -
Controller
BOCHU New Product -
2D Cutting Head
Tube Cutting Head
3D Cutting Head
Consumables
BOCHU New Product -
Servo
BOCHU New Product -
Industrial 4.0
-
- Support
- About
- Online Store


- Software Download
- Manual
- Video
- Tutorial
In SmartDraw, dimensions can be used to determine the size and position of a shape.
2 ways to edit dimensions in Smart Draw.
- Add dimension
- Edit endpoint coordinates
Add Dimension
To activate the "add size" command, first select the graphic by clicking on it. Then, select the object for dimensioning and click on a blank space. In the pop-up window, enter the dimension value and press Enter to confirm.
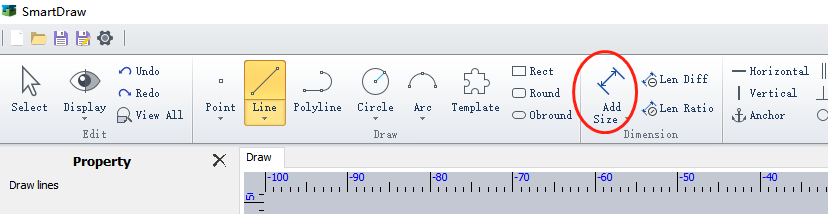
Depending on where you click on the blank space, different types of dimensioning may be automatically generated. For example, in the following image of a straight line, the dimensions are length, horizontal, and vertical.
In addition to lines, dimensions can also be added to points, arcs radius, circle radius, points to lines, and lines to lines.
When annotating angles, you can select two non-parallel lines or three points (with the second point being the vertex of the angle). For example, when annotating the angle of an arc, the angle measurement may differ depending on the order in which points are selected.
For dimensions that have already been added, double-clicking on the number allows you to modify it again.
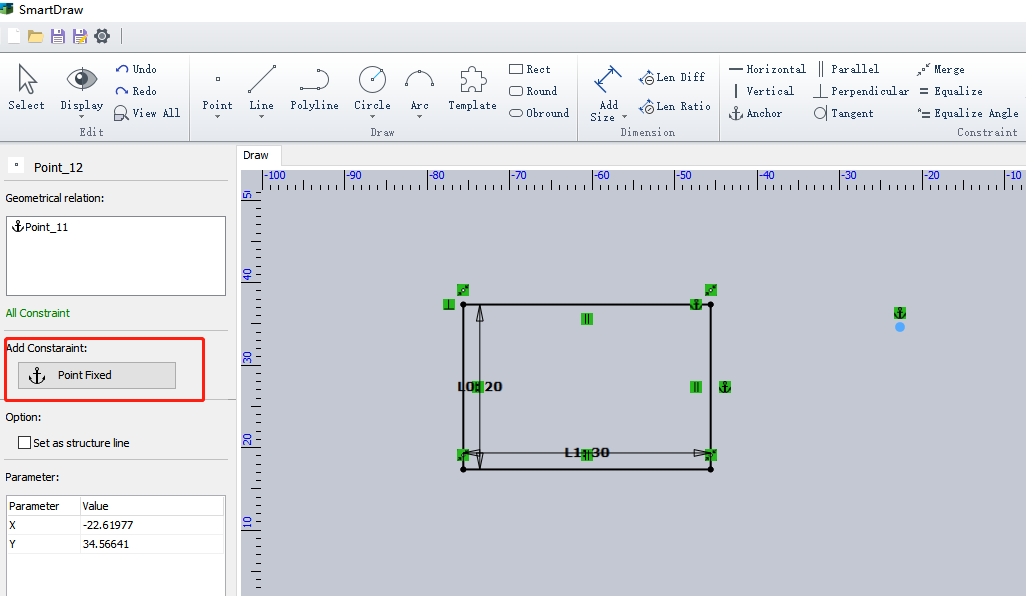
Redundant dimensions are displayed in gray and are only for display purposes; they cannot be actively modified. For example, in the following image, the length and horizontal dimensions of the line have already been set. Therefore, the vertical dimension that is added last can only be for display purposes since its value is already determined.
Edit endpoint coordinates
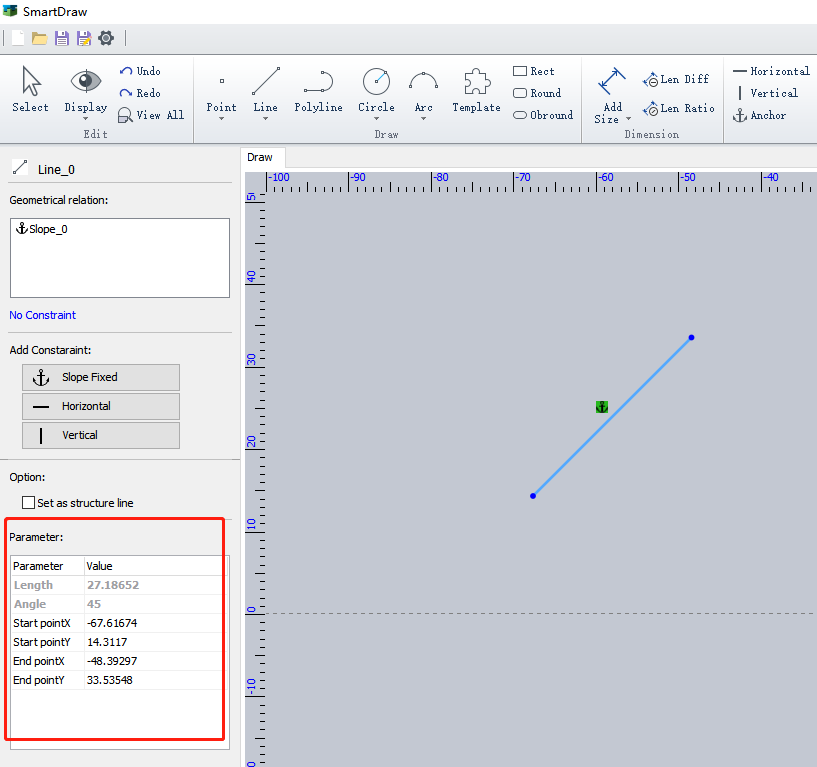
When you select a drawn shape, you can see its corresponding parameters in the information bar on the left.
For example, for the line in the following image, the information bar displays the start and end coordinates, as well as the length and angle of the line.
Among these parameters, the start and end coordinates can be modified, while the length and angle cannot be directly modified because they are determined by the start and end coordinates.
Notes:
- The numerical values displayed in the information bar are for reference. Once dimensions or geometric constraints are added, the position and size of the shape may be changed and no longer be the result of numerical values.
- However, if you modify the coordinates and then apply a "fixed" constraint to the shape (such as fixing a point or setting the slope of a line), the resulting shape cannot be changed by other dimensions or constraints.
Size Chart
Click Add Size and the size chart will show.
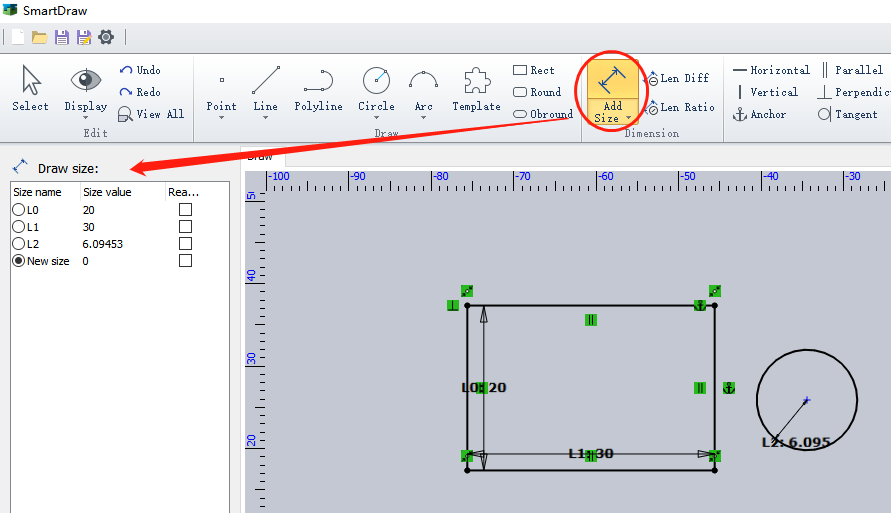
By default, every time a dimension is added, it is a new dimension, with length labeled as "L" and angle labeled as "A."
If you want a batch of dimensions to have the same value, you can first select a "dimension name," and then add the dimensions. After that, you can modify them in batches.
Length Diff and Length Ratio
Click Len Diff, and select two lines, click the checkmark, and enter a value. The two lines will always maintain this distance difference from now on.
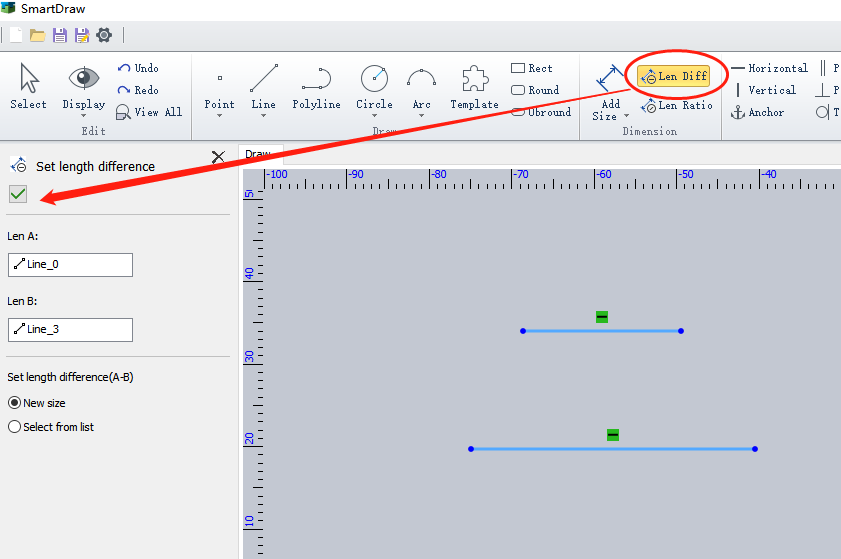
It is the same to set the length ratio.
In SmartDraw, dimensions can be used to determine the size and position of a shape.
2 ways to edit dimensions in Smart Draw.
- Add dimension
- Edit endpoint coordinates
Add Dimension
To activate the "add size" command, first select the graphic by clicking on it. Then, select the object for dimensioning and click on a blank space. In the pop-up window, enter the dimension value and press Enter to confirm.
Depending on where you click on the blank space, different types of dimensioning may be automatically generated. For example, in the following image of a straight line, the dimensions are length, horizontal, and vertical.
In addition to lines, dimensions can also be added to points, arcs radius, circle radius, points to lines, and lines to lines.
When annotating angles, you can select two non-parallel lines or three points (with the second point being the vertex of the angle). For example, when annotating the angle of an arc, the angle measurement may differ depending on the order in which points are selected.
For dimensions that have already been added, double-clicking on the number allows you to modify it again.
Redundant dimensions are displayed in gray and are only for display purposes; they cannot be actively modified. For example, in the following image, the length and horizontal dimensions of the line have already been set. Therefore, the vertical dimension that is added last can only be for display purposes since its value is already determined.
Edit endpoint coordinates
When you select a drawn shape, you can see its corresponding parameters in the information bar on the left.
For example, for the line in the following image, the information bar displays the start and end coordinates, as well as the length and angle of the line.
Among these parameters, the start and end coordinates can be modified, while the length and angle cannot be directly modified because they are determined by the start and end coordinates.
Notes:
- The numerical values displayed in the information bar are for reference. Once dimensions or geometric constraints are added, the position and size of the shape may be changed and no longer be the result of numerical values.
- However, if you modify the coordinates and then apply a "fixed" constraint to the shape (such as fixing a point or setting the slope of a line), the resulting shape cannot be changed by other dimensions or constraints.
Size Chart
Click Add Size and the size chart will show.
By default, every time a dimension is added, it is a new dimension, with length labeled as "L" and angle labeled as "A."
If you want a batch of dimensions to have the same value, you can first select a "dimension name," and then add the dimensions. After that, you can modify them in batches.
Length Diff and Length Ratio
Click Len Diff, and select two lines, click the checkmark, and enter a value. The two lines will always maintain this distance difference from now on.
It is the same to set the length ratio.

