

-
Products
Overview Products

-
2D Cutting
-
Tube Cutting
-
3D Cutting
-
Intelligent Welding
-
Intelligent Cutting Head
-
Industrial Automation
-
Industrial Software
-
Combination
-
Combination
BOCHU New Product -
Combination
BOCHU New Product -
Controller
BOCHU New Product -
2D Cutting Head
Tube Cutting Head
3D Cutting Head
Consumables
BOCHU New Product -
Servo
BOCHU New Product -
Industrial 4.0
-
- Support
- About
- Online Store


- Software Download
- Manual
- Video
- Tutorial
Ⅰ. Overview
The nesting report is used to quote and verify the production plan during the nesting process.
In TubesT 7.1.55 version, the Report feature has been significantly optimized, with major updates to the interaction and data display.
You can now edit the report template and modify the layout and data display. Operations include Save as New Template, Save Template, Import Template, and Export Template.
If you have already read this function description before, you may open it to quickly locate or confirm information. Click the following links to jump to the relevant sections:
② General Settings of Reports (Quote Parameters and File Configuration)
★ After clicking, simply scroll the mouse wheel upward to jump to the corresponding headings.
Ⅱ. Instruction
After nesting, click Report to enter the report preview interface.
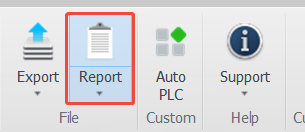

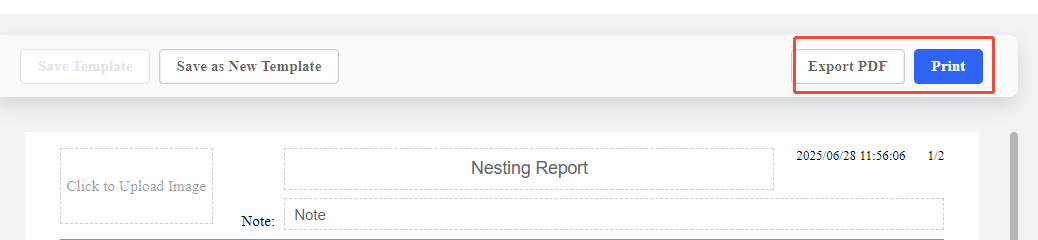
Click Print or Export PDF if the report meets your needs. To modify the report, refer to the following description.
Ⅲ. Report Modification
1. Template Selection
The software provides several parameters to display in the report. You can choose the display content as required. Based on the selection, you can save the report as a new template.
The difference between templates lies in the number of parameters displayed and the layout.
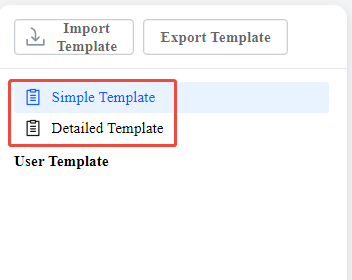
★ If you do not have a preferred layout yet, choose <Simple Template> or <Detailed Template> to start.
2. Header Customization
You can add a custom logo to the header and enter the report name and notes. The report time in the top-right corner is generated automatically.

3. Form Style
You can adjust the margin and row height of the form. Left-click the column boundary and drag the mouse to adjust the width of each column.
4. Quote Configuration
-
- Pricing Unit: Only changes the unit display in the report (no actual currency conversion involved).
- Unit Price of Parts: Sets the unit price for a specific part.
(The current quotation method only supports simple piercing per part.)

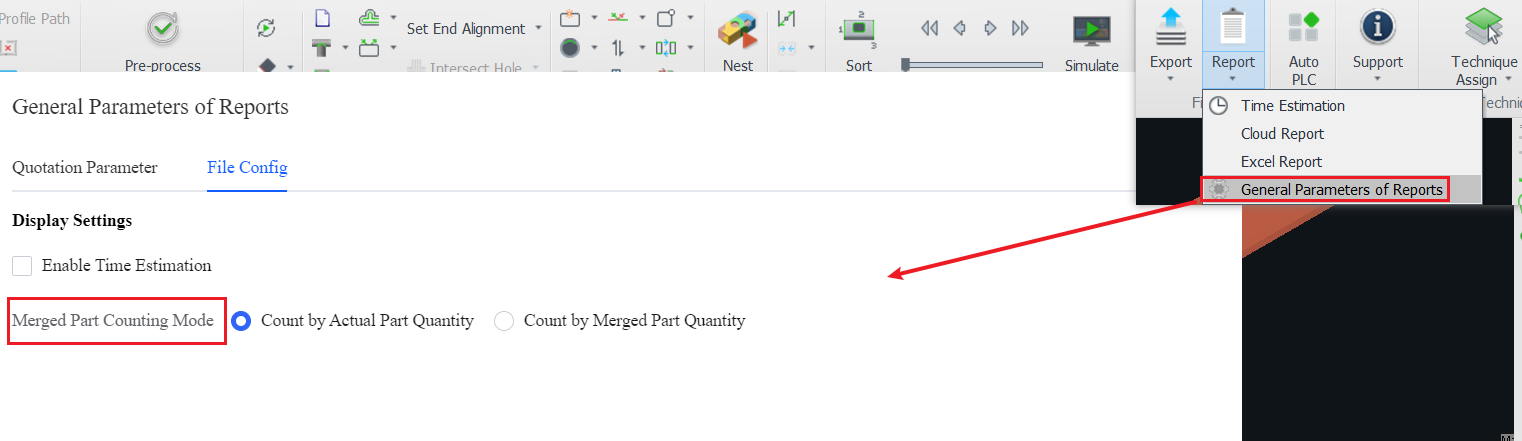
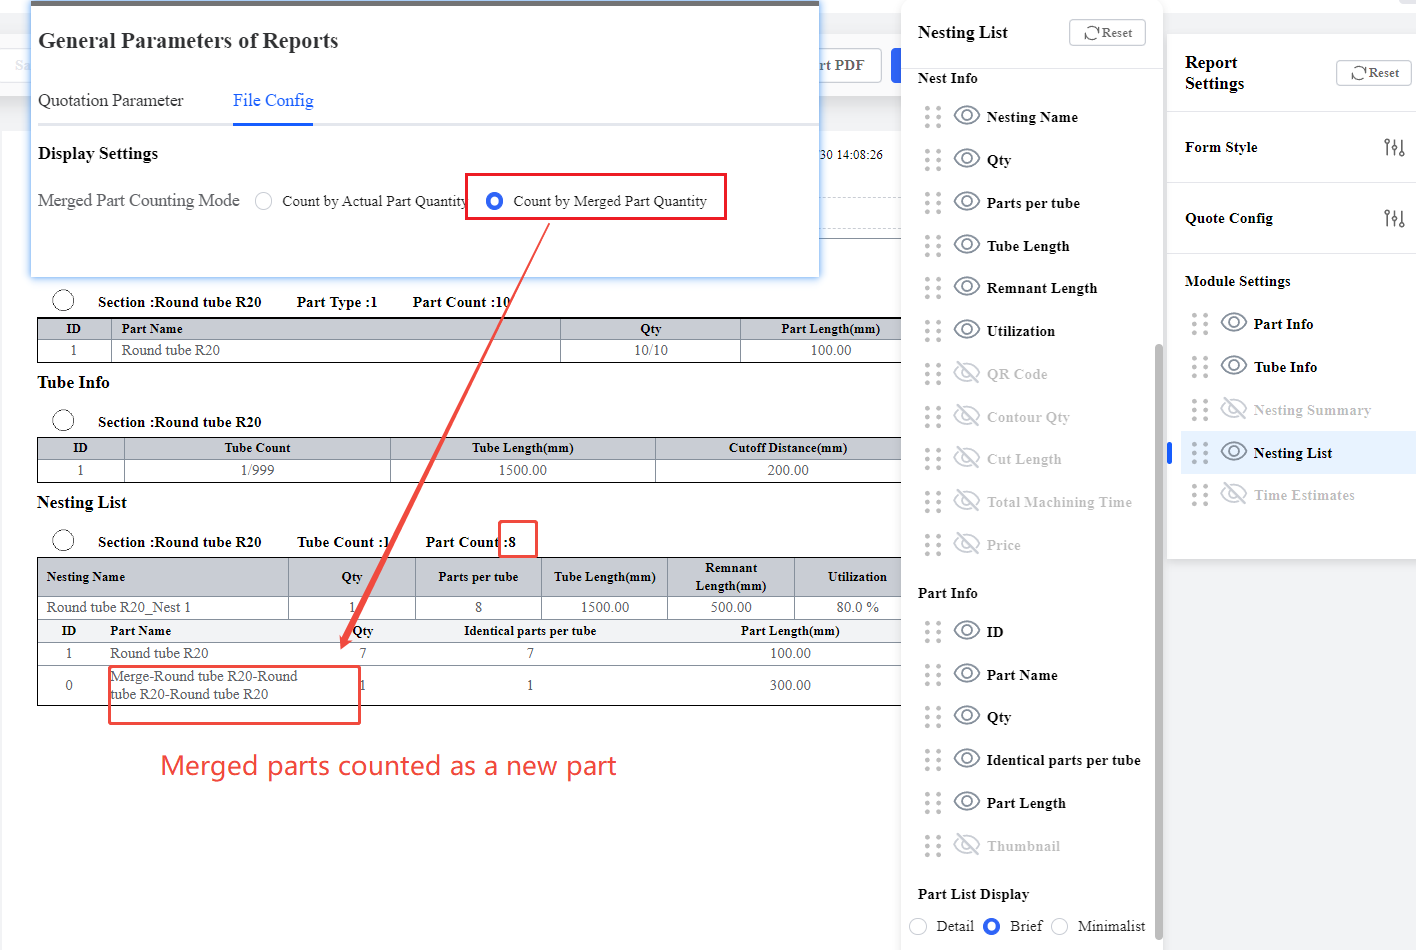
You can also configure the quotation on the 【General Parameters of Reports → File Config】page, where Merged Part Counting Mode is supported to choose.
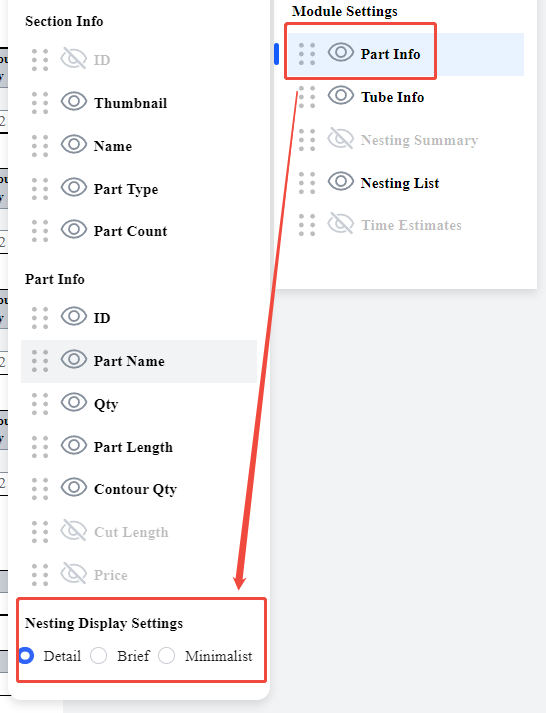
5. Module Settings
-
-
- Toggle the display of modules using the eye icon.
- left-click and drag to rearrange the entity order.
- Right-click to rename each entity under the module.
-
6. General Settings of Reports
In addition to the quotation parameters mentioned above, you can also configure the following:
-
-
- Merged Part Counting Mode: If 【Join Parts】 is used during nesting, select Count by Actual Part Quantity or Count by Merged Part Quantity to display the count in the report.
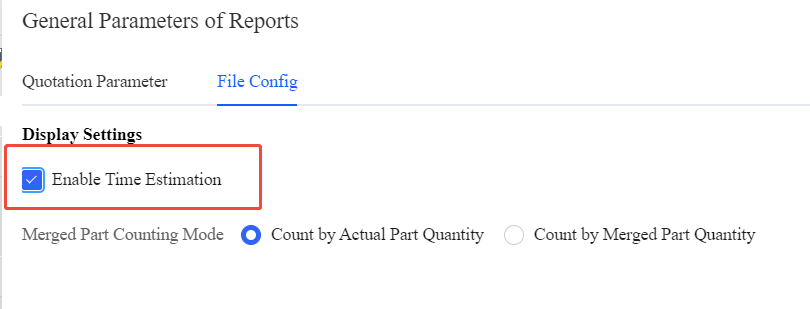
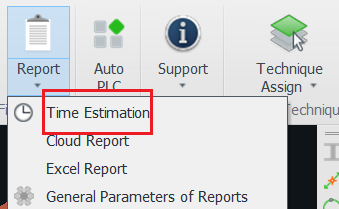
- Time Estimation: Used to estimate the machining time in the nesting results. For more information, please refer to the tutorial: Time Estimation
-
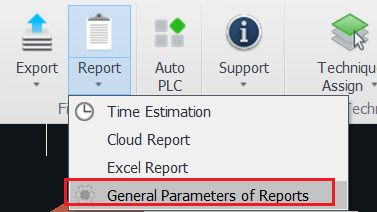
- Enable this feature by clicking 【Time Estimation】under Report.
-
-
-
-
-
-
- Or checking Enable Time Estimation the on the General Parameters of Reports → File Config page.
-
-
-
Ⅳ. Parameter Definitions
1. Part Information
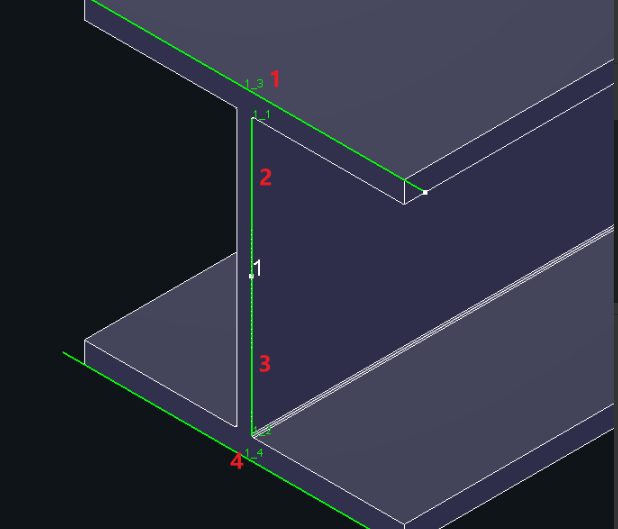
① Contour Quantity: Number of toolpaths. For special profiles like Angle Section, Channel Section, and I-Beam, the number of toolpaths is the sum of the divided toolpaths. For example, the contour quantity of the I-Beam cutoff is 4.
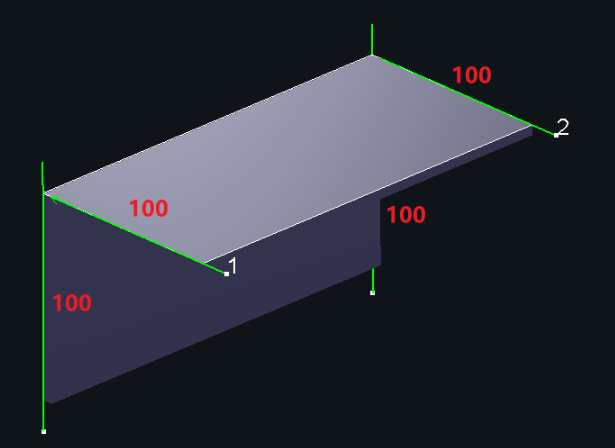
② Cut Length: Total length of the toolpath (excluding the gaps of special toolpaths). For example, for a 100 mm x 100 mm Angle Section, the cut length is 400 mm.
③ Loop Nesting Display Settings:
-
-
- Detail: Displays both original and cut parts.
- Brief: Displays only the original parts.
- Minimalist: Displays the cut parts.
-
2. Tube Information
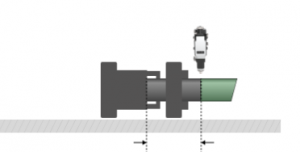
Cutoff Distance: The remnant that cannot be cut by the non-zero tail material machines.
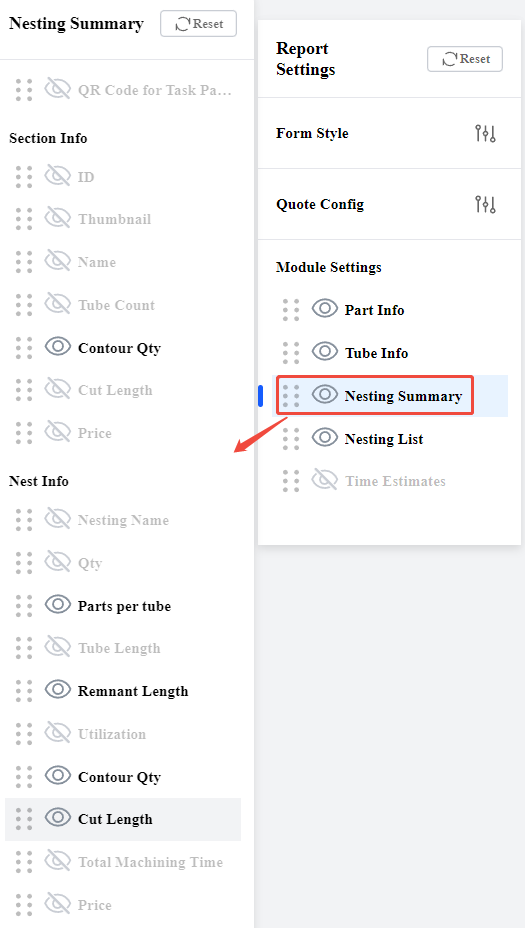
3. Nesting Summary
-
- Section Information
- Contour Quantity: Total contour count across all toolpaths in the current section.
- Section Information
-
- Nest Information
- Parts per tube: Total number of parts per tube in the current nesting result.
- Remnant Length: Remnant length in the current nesting result.
- Contour Quantity: Total contour count across all toolpaths in the current nesting result.
- Cut Length: Total cutting length across all toolpaths in the current nesting result.
- Nest Information
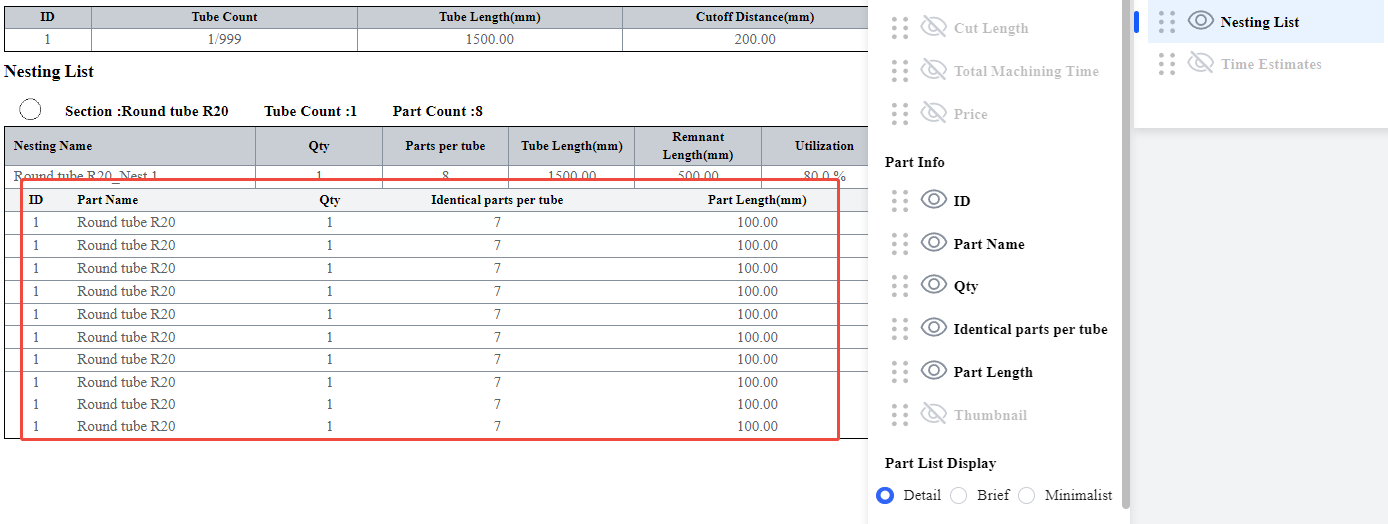
4. Nesting List
-
- Part List Display: Displayed in the following three formats. The part quantity is shown depending on the selected Merged Part Counting Mode: Count by Actual Part Counting Mode or Count by Merged Part Quantity.
- Detail: Displays the individual parts and their quantities in nested sequence before merging.
- Part List Display: Displayed in the following three formats. The part quantity is shown depending on the selected Merged Part Counting Mode: Count by Actual Part Counting Mode or Count by Merged Part Quantity.
-
-
- Brief: Displays the individual parts and their quantities in nested sequence after merging the parts.
-
-
-
- Minimalist: Displays only the total number of parts.
-
5. Time Estimate
-
- Cut Speed: Depends on the settings in TubePro.
V. FAQ
1. How to Save a Custom Report Template?
The software provides two default templates: Simple Template and Detailed Template. In addition, you can modify the report and save it as a new template for future use.
-
-
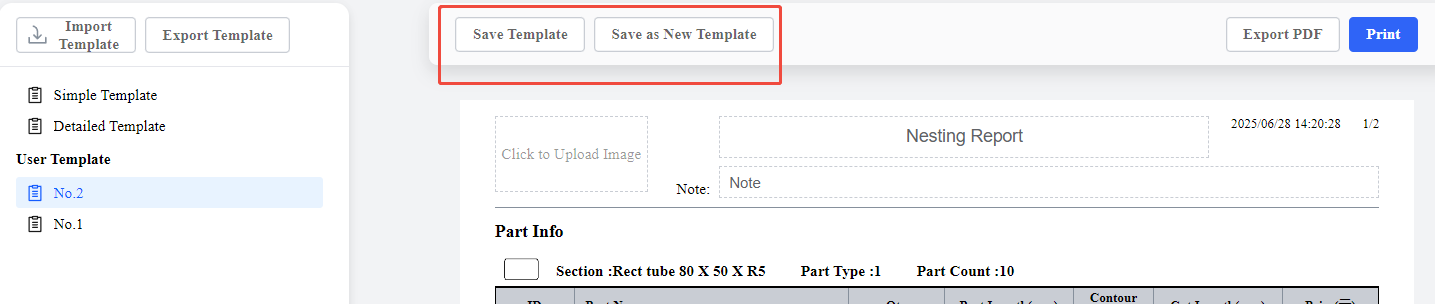
- Save Template/Save as New Template
-
-
-
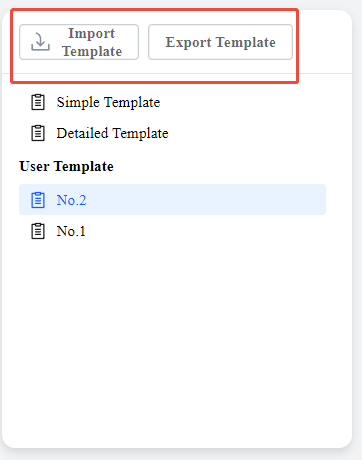
- Import/Export Template: Allows you to import a template for another user or share your custom template.
-
-
-
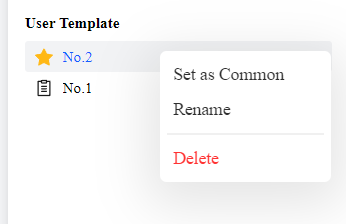
- Edit the Report: Right-click the user template name to access more operations, including Set as Common, Rename, and Delete. Common templates are marked with a yellow star on the left side of the template name.
-
2. How to display thickness in the report?
If you want to display the thickness in the section information, you must enable Differentiate Part Thickness in the User Preference Settings. For the tutorial on how to enable this feature, refer to TubesT-Part Thickness Discrimination.
3. How to use the QR code?
When using TubesT+TubePro with RayBox, the software will generate a processing program QR code after nesting. Then, you can scan the QR code using a scanner to open the corresponding processing program in TubePro.
4. How to differentiate the T-Section Part in the report?
-
- Tube Information: Does NOT display T-Section parts, but shows the actual H-Beam.
- Part Information: Displays T-Section parts and jointed H-beam parts (separate in different sections).
Ⅰ. Overview
The nesting report is used to quote and verify the production plan during the nesting process.
In TubesT 7.1.55 version, the Report feature has been significantly optimized, with major updates to the interaction and data display.
You can now edit the report template and modify the layout and data display. Operations include Save as New Template, Save Template, Import Template, and Export Template.
If you have already read this function description before, you may open it to quickly locate or confirm information. Click the following links to jump to the relevant sections:
② General Settings of Reports (Quote Parameters and File Configuration)
★ After clicking, simply scroll the mouse wheel upward to jump to the corresponding headings.
Ⅱ. Instruction
After nesting, click Report to enter the report preview interface.
Click Print or Export PDF if the report meets your needs. To modify the report, refer to the following description.
Ⅲ. Report Modification
1. Template Selection
The software provides several parameters to display in the report. You can choose the display content as required. Based on the selection, you can save the report as a new template.
The difference between templates lies in the number of parameters displayed and the layout.
★ If you do not have a preferred layout yet, choose <Simple Template> or <Detailed Template> to start.
2. Header Customization
You can add a custom logo to the header and enter the report name and notes. The report time in the top-right corner is generated automatically.
3. Form Style
You can adjust the margin and row height of the form. Left-click the column boundary and drag the mouse to adjust the width of each column.
4. Quote Configuration
-
- Pricing Unit: Only changes the unit display in the report (no actual currency conversion involved).
- Unit Price of Parts: Sets the unit price for a specific part.
(The current quotation method only supports simple piercing per part.)
You can also configure the quotation on the 【General Parameters of Reports → File Config】page, where Merged Part Counting Mode is supported to choose.
5. Module Settings
-
-
- Toggle the display of modules using the eye icon.
- left-click and drag to rearrange the entity order.
- Right-click to rename each entity under the module.
-
6. General Settings of Reports
In addition to the quotation parameters mentioned above, you can also configure the following:
-
-
- Merged Part Counting Mode: If 【Join Parts】 is used during nesting, select Count by Actual Part Quantity or Count by Merged Part Quantity to display the count in the report.
- Time Estimation: Used to estimate the machining time in the nesting results. For more information, please refer to the tutorial: Time Estimation
-
- Enable this feature by clicking 【Time Estimation】under Report.
-
-
-
-
-
-
- Or checking Enable Time Estimation the on the General Parameters of Reports → File Config page.
-
-
-
Ⅳ. Parameter Definitions
1. Part Information
① Contour Quantity: Number of toolpaths. For special profiles like Angle Section, Channel Section, and I-Beam, the number of toolpaths is the sum of the divided toolpaths. For example, the contour quantity of the I-Beam cutoff is 4.
② Cut Length: Total length of the toolpath (excluding the gaps of special toolpaths). For example, for a 100 mm x 100 mm Angle Section, the cut length is 400 mm.
③ Loop Nesting Display Settings:
-
-
- Detail: Displays both original and cut parts.
- Brief: Displays only the original parts.
- Minimalist: Displays the cut parts.
-
2. Tube Information
Cutoff Distance: The remnant that cannot be cut by the non-zero tail material machines.
3. Nesting Summary
-
- Section Information
- Contour Quantity: Total contour count across all toolpaths in the current section.
- Section Information
-
- Nest Information
- Parts per tube: Total number of parts per tube in the current nesting result.
- Remnant Length: Remnant length in the current nesting result.
- Contour Quantity: Total contour count across all toolpaths in the current nesting result.
- Cut Length: Total cutting length across all toolpaths in the current nesting result.
- Nest Information
4. Nesting List
-
- Part List Display: Displayed in the following three formats. The part quantity is shown depending on the selected Merged Part Counting Mode: Count by Actual Part Counting Mode or Count by Merged Part Quantity.
- Detail: Displays the individual parts and their quantities in nested sequence before merging.
- Part List Display: Displayed in the following three formats. The part quantity is shown depending on the selected Merged Part Counting Mode: Count by Actual Part Counting Mode or Count by Merged Part Quantity.
-
-
- Brief: Displays the individual parts and their quantities in nested sequence after merging the parts.
-
-
-
- Minimalist: Displays only the total number of parts.
-
5. Time Estimate
-
- Cut Speed: Depends on the settings in TubePro.
V. FAQ
1. How to Save a Custom Report Template?
The software provides two default templates: Simple Template and Detailed Template. In addition, you can modify the report and save it as a new template for future use.
-
-
- Save Template/Save as New Template
-
-
-
- Import/Export Template: Allows you to import a template for another user or share your custom template.
-
-
-
- Edit the Report: Right-click the user template name to access more operations, including Set as Common, Rename, and Delete. Common templates are marked with a yellow star on the left side of the template name.
-
2. How to display thickness in the report?
If you want to display the thickness in the section information, you must enable Differentiate Part Thickness in the User Preference Settings. For the tutorial on how to enable this feature, refer to TubesT-Part Thickness Discrimination.
3. How to use the QR code?
When using TubesT+TubePro with RayBox, the software will generate a processing program QR code after nesting. Then, you can scan the QR code using a scanner to open the corresponding processing program in TubePro.
4. How to differentiate the T-Section Part in the report?
-
- Tube Information: Does NOT display T-Section parts, but shows the actual H-Beam.
- Part Information: Displays T-Section parts and jointed H-beam parts (separate in different sections).

