

-
Products
Overview Products

-
2D Cutting
-
Tube Cutting
-
3D Cutting
-
Intelligent Welding
-
Intelligent Cutting Head
-
Industrial Automation
-
Industrial Software
-
Combination
-
Combination
BOCHU New Product -
Combination
BOCHU New Product -
Controller
BOCHU New Product -
2D Cutting Head
Tube Cutting Head
3D Cutting Head
Consumables
BOCHU New Product -
Servo
BOCHU New Product -
Industrial 4.0
-
- Support
- About
- Online Store


- Software Download
- Manual
- Tutorial
- CloudNest
Do you know?
After nest, if you want to add microjoints to co-edged groups, follow these methods.
Manually Add
Click the Microjoint button, then directly click the part contour.
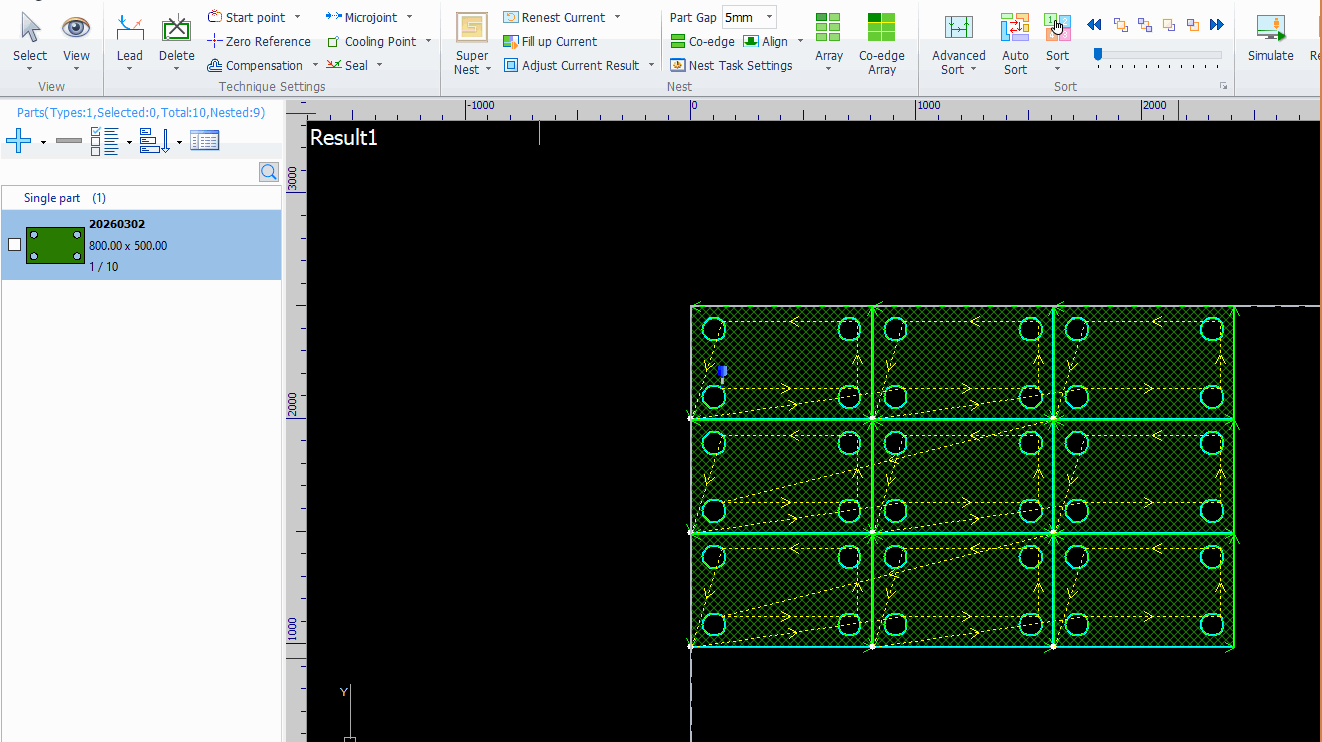
Auto Microjoint
Click Auto Microjoint and check Apply at co-edged line .You can select Co-edge add once to avoid duplicate microjoints.

Add Microjoint by Line:
Click Add Microjoint by Line and check Apply to Co-edge.
Draw lines with the mouse to add micro-joints on co-edges.

Microjoint at Long Side
Click Microjoint at Long Side and check Apply to Co-edge, so that you can add microjoints on co-edges within the set parameter range.

Microjoint in Cross
Click Microjoint in Cross and check Apply to Co-edge to add microjoints on co-edges within the set parameter range.

Do you know?
After nest, if you want to add microjoints to co-edged groups, follow these methods.
Manually Add
Click the Microjoint button, then directly click the part contour.
Auto Microjoint
Click Auto Microjoint and check Apply at co-edged line .You can select Co-edge add once to avoid duplicate microjoints.
Add Microjoint by Line:
Click Add Microjoint by Line and check Apply to Co-edge.
Draw lines with the mouse to add micro-joints on co-edges.
Microjoint at Long Side
Click Microjoint at Long Side and check Apply to Co-edge, so that you can add microjoints on co-edges within the set parameter range.
Microjoint in Cross
Click Microjoint in Cross and check Apply to Co-edge to add microjoints on co-edges within the set parameter range.

