

-
Products
Overview Products

-
2D Cutting
-
Tube Cutting
-
3D Cutting
-
Intelligent Welding
-
Intelligent Cutting Head
-
Industrial Automation
-
Industrial Software
-
Combination
-
Combination
BOCHU New Product -
Combination
BOCHU New Product -
Controller
BOCHU New Product -
2D Cutting Head
Tube Cutting Head
3D Cutting Head
Consumables
BOCHU New Product -
Servo
BOCHU New Product -
Industrial 4.0
-
- Support
- About
- Online Store


- Software Download
- Manual
- Tutorial
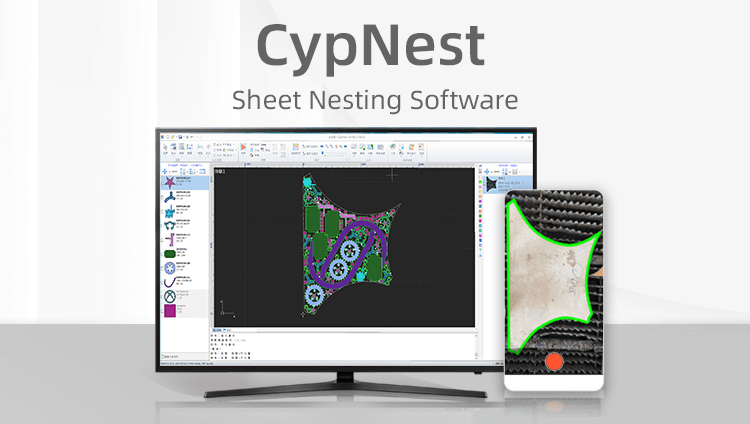
- CloudNest
1. Function description
If your drawing is in dxf format and there is only one part in a drawing file, Part information Specify using the information in the Excel spreadsheet, you can use the Excel Batch Import dxf function to import parts Import to CloudNest.
2. Operating Steps
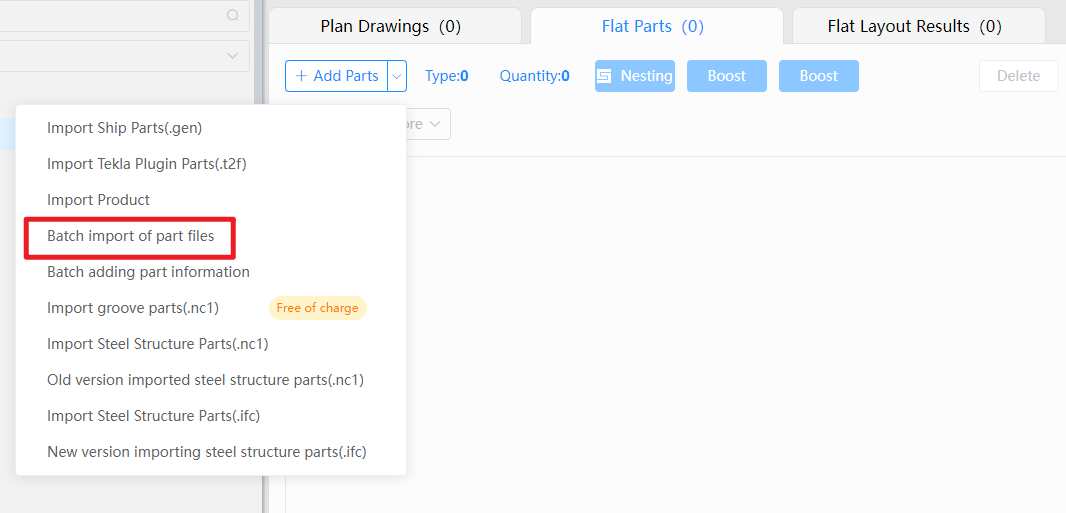
1. Click [Add] drop-down list -- [Batch Import of Part files]
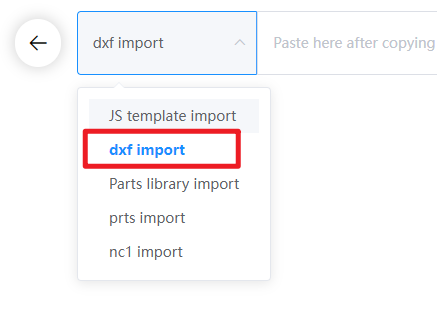
2. Type select dxf import
3. Copy the information from Excel and paste it into the text box (the header also needs to be copied).

4. dxf file and property configuration
(1) [Relative path]
Click [Fiile Path], select the header corresponding to the dxf File Name. (This dxf file in this case Mappings corresponding to the information in the column [Part Name] in Excel, so select [Part Name]

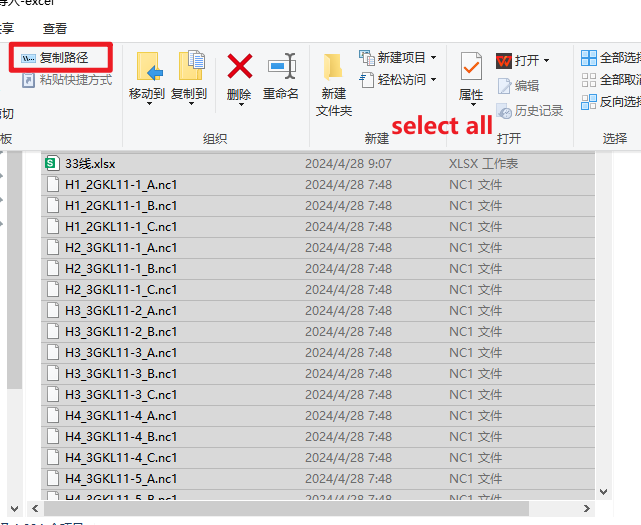
Fiile Path needs to copy the folder path where the dxf drawings are stored and paste it under [Relative path].
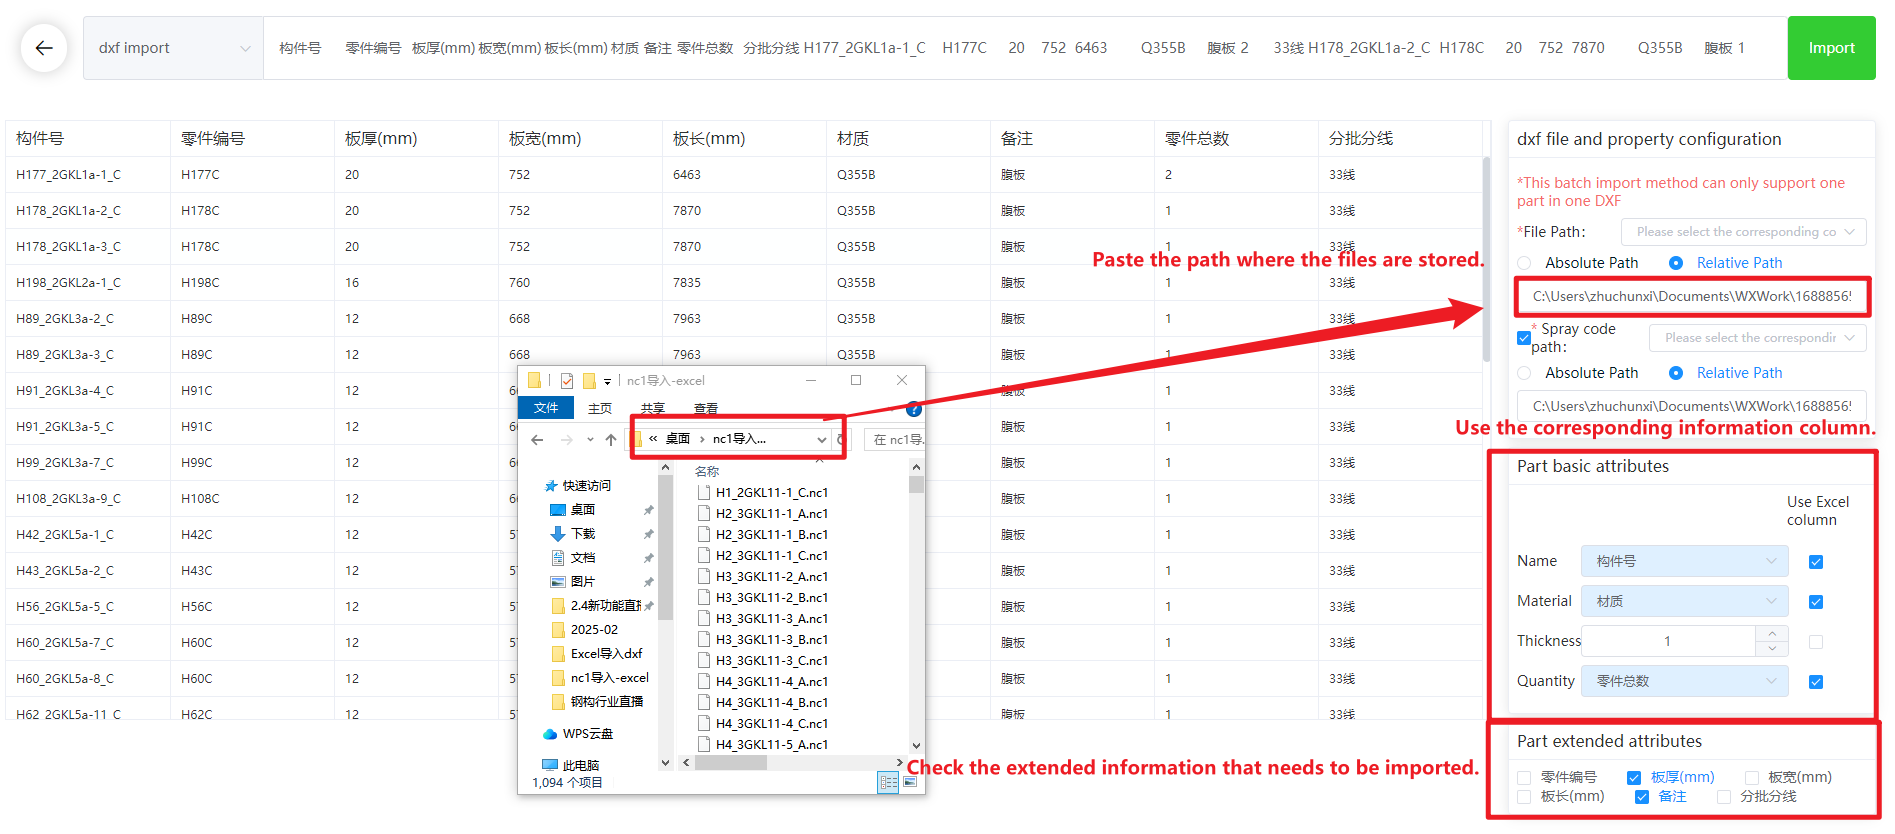
(2) [Absolute path]
Click [Fiile Path], select the header corresponding to the dxf Fiile Path in Excel. For example, this table In [Drawing Fiile Path] .
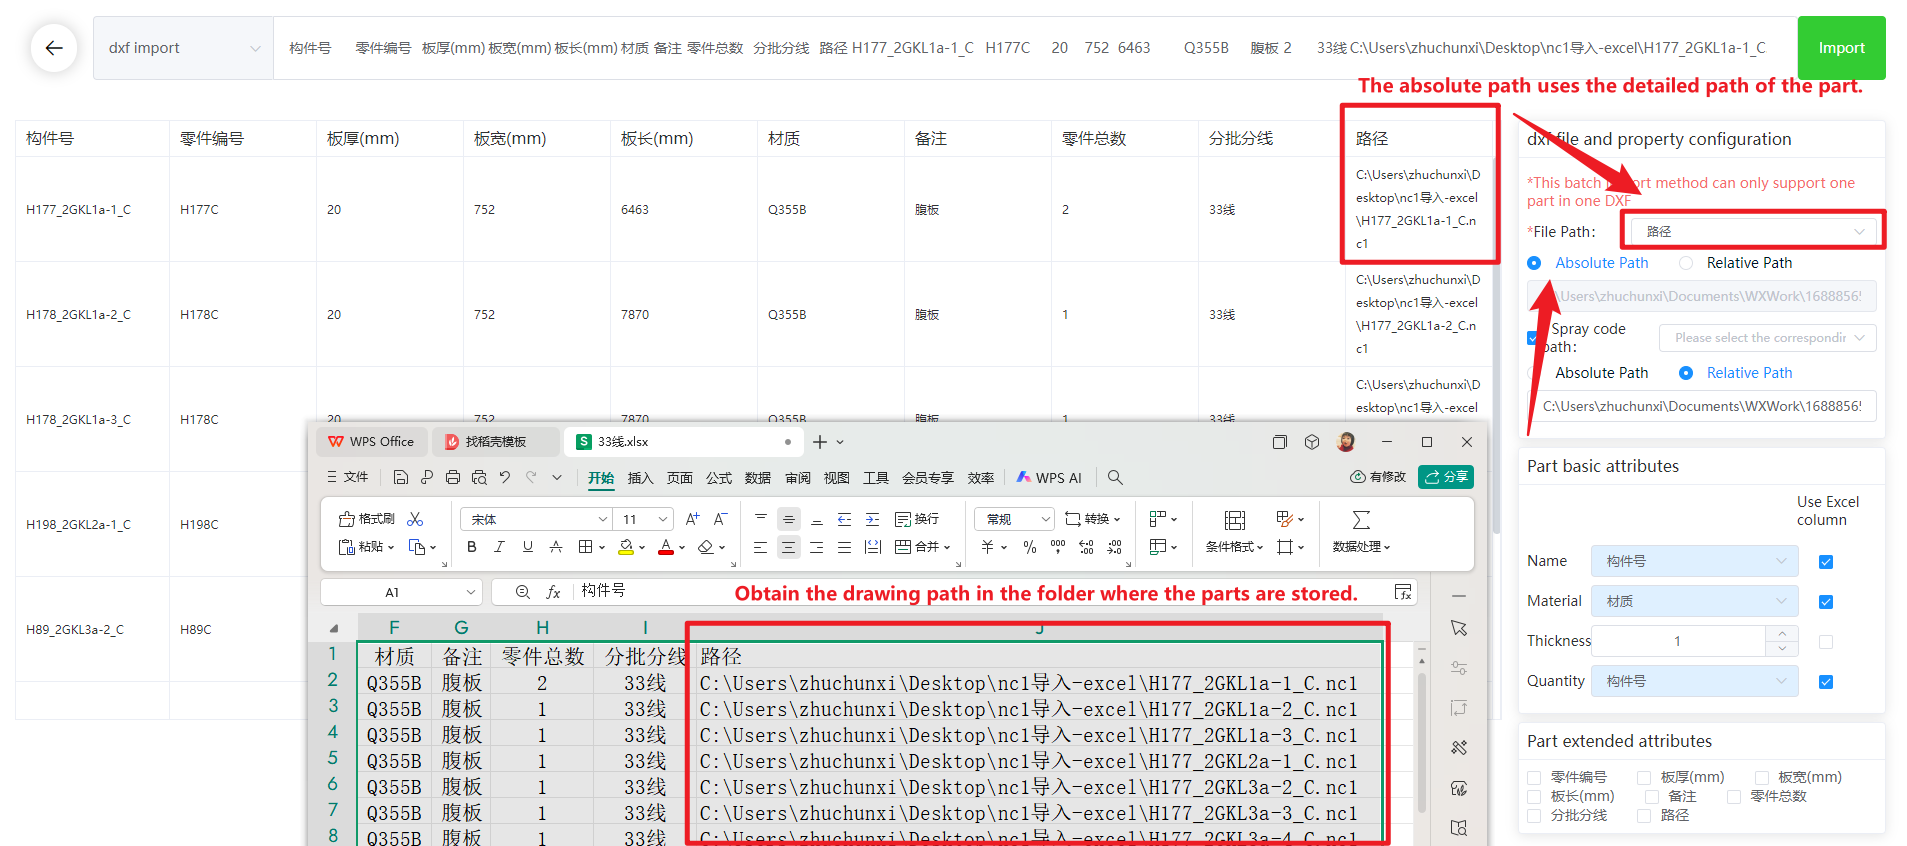
(Fiile Path is copied from the folder where the dxf files are stored)
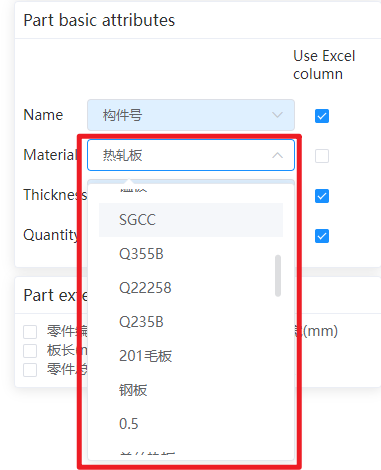
5.Part Base Property
Check [Use Excel Column]: Select the information in the Excel spreadsheet to map to parts.

Do not check [Use Excel Column]: Can customize part information.
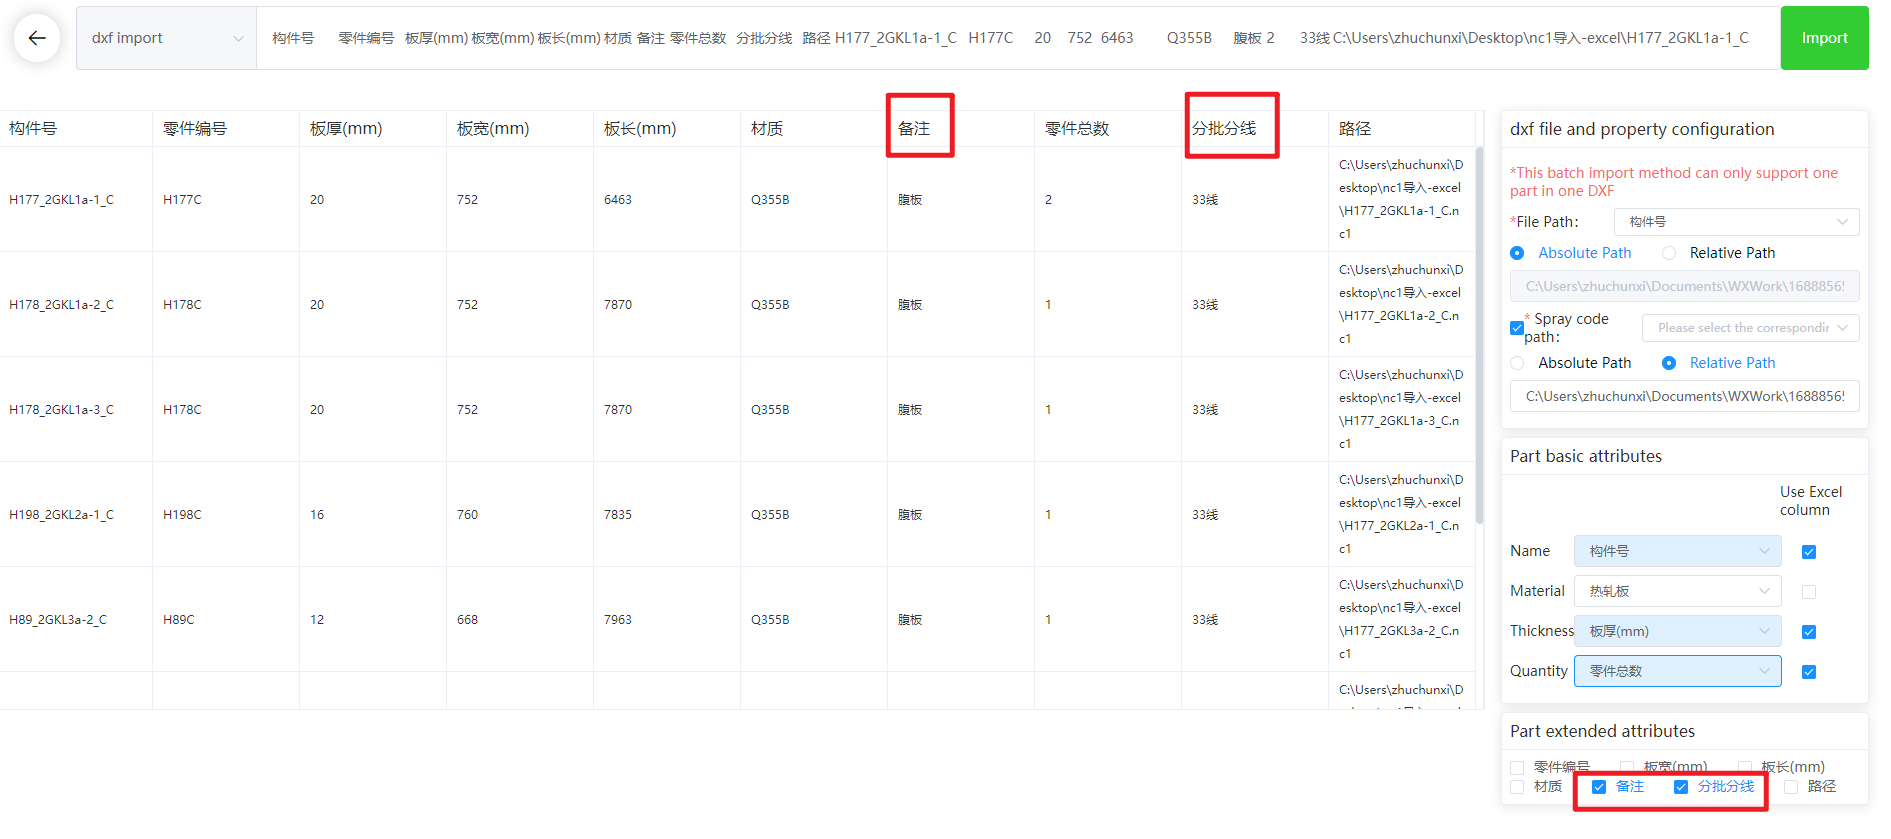
6. Part extension attributes.
For example: components, teams, etc., check extended information to import, extended information will be attached to corresponding parts.
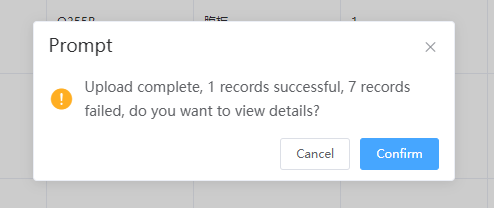
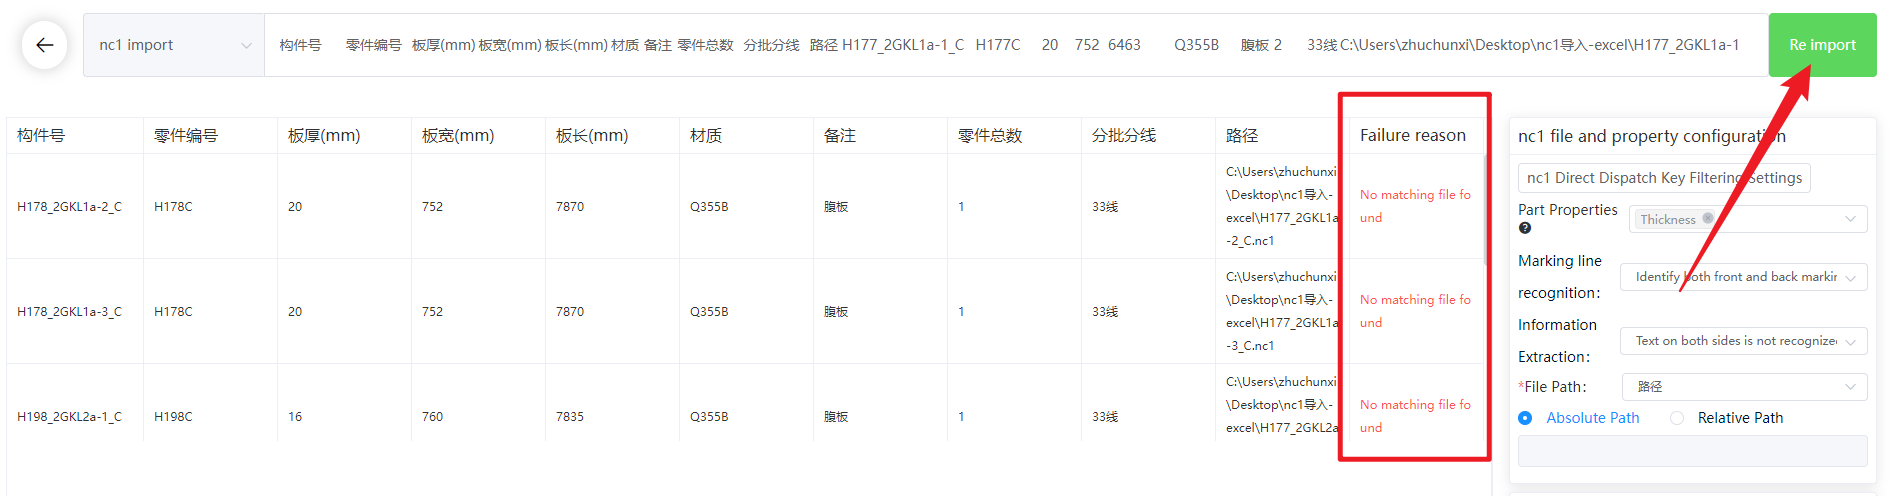
7. Click Top right corner [Import], if there are parts with Import failure, click OK to view the failure reason.
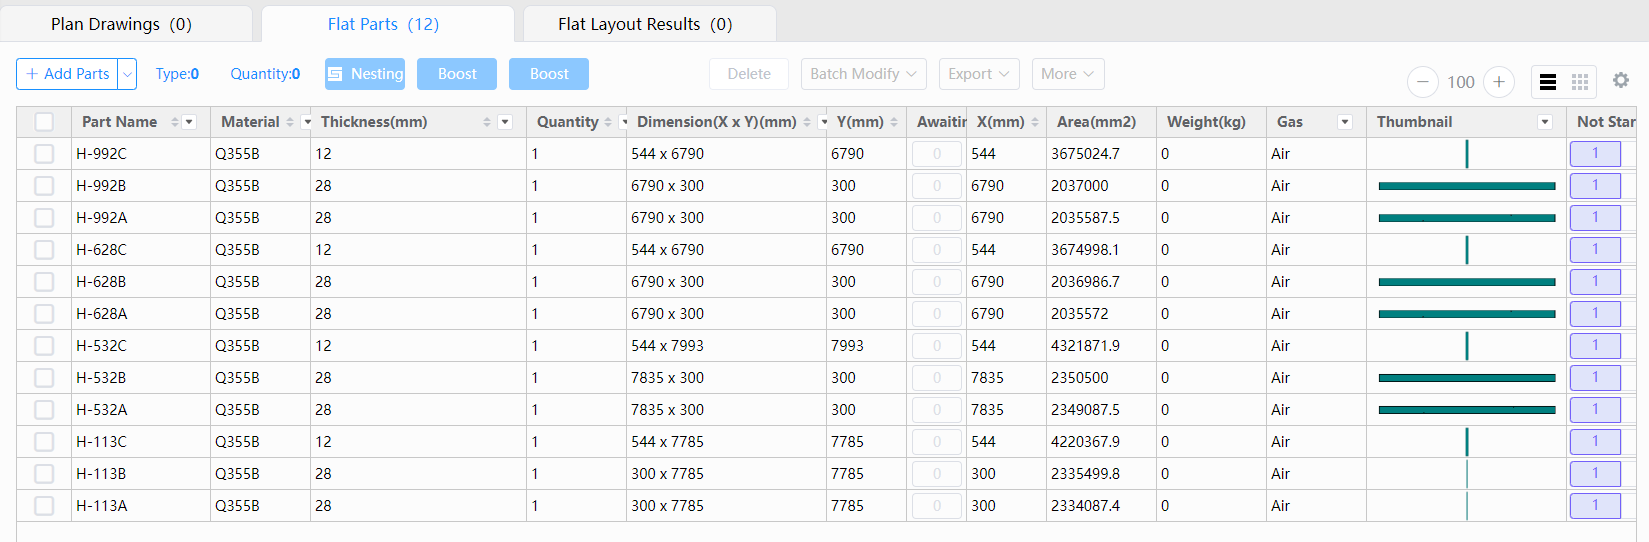
8. Return to view the imported parts with CloudNestPart List.
1. Function description
If your drawing is in dxf format and there is only one part in a drawing file, Part information Specify using the information in the Excel spreadsheet, you can use the Excel Batch Import dxf function to import parts Import to CloudNest.
2. Operating Steps
1. Click [Add] drop-down list -- [Batch Import of Part files]
2. Type select dxf import
3. Copy the information from Excel and paste it into the text box (the header also needs to be copied).
4. dxf file and property configuration
(1) [Relative path]
Click [Fiile Path], select the header corresponding to the dxf File Name. (This dxf file in this case Mappings corresponding to the information in the column [Part Name] in Excel, so select [Part Name]
Fiile Path needs to copy the folder path where the dxf drawings are stored and paste it under [Relative path].
(2) [Absolute path]
Click [Fiile Path], select the header corresponding to the dxf Fiile Path in Excel. For example, this table In [Drawing Fiile Path] .
(Fiile Path is copied from the folder where the dxf files are stored)
5.Part Base Property
Check [Use Excel Column]: Select the information in the Excel spreadsheet to map to parts.
Do not check [Use Excel Column]: Can customize part information.
6. Part extension attributes.
For example: components, teams, etc., check extended information to import, extended information will be attached to corresponding parts.
7. Click Top right corner [Import], if there are parts with Import failure, click OK to view the failure reason.
8. Return to view the imported parts with CloudNestPart List.

