

-
Products
Overview Products

-
2D Cutting
-
Tube Cutting
-
3D Cutting
-
Intelligent Welding
-
Intelligent Cutting Head
-
Industrial Automation
-
Industrial Software
-
Combination
-
Combination
BOCHU New Product -
Combination
BOCHU New Product -
Controller
BOCHU New Product -
2D Cutting Head
Tube Cutting Head
3D Cutting Head
Consumables
BOCHU New Product -
Servo
BOCHU New Product -
Industrial 4.0
-
- Support
- About
- Online Store


- Software Download
- Manual
- Tutorial
- CloudNest
1. Function description
If you have uploaded the part to CloudNest, you need to specify the material and thickness of the part through the Excel sheet degree, quantity, etc. You can use this function to assign relevant information to parts already uploaded to CloudNest.Part Name must correspond to a certain column of information in the table.

2. Operating Steps
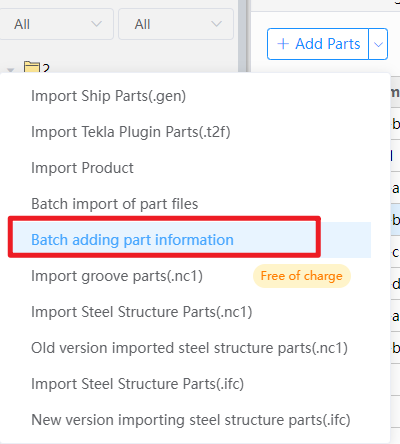
1. Click [Add] dropdown list – [Batch Adding part information]
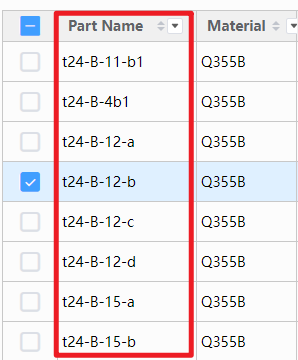
2. Copy the information from the table and paste it into the text box (the header must also be copied!)
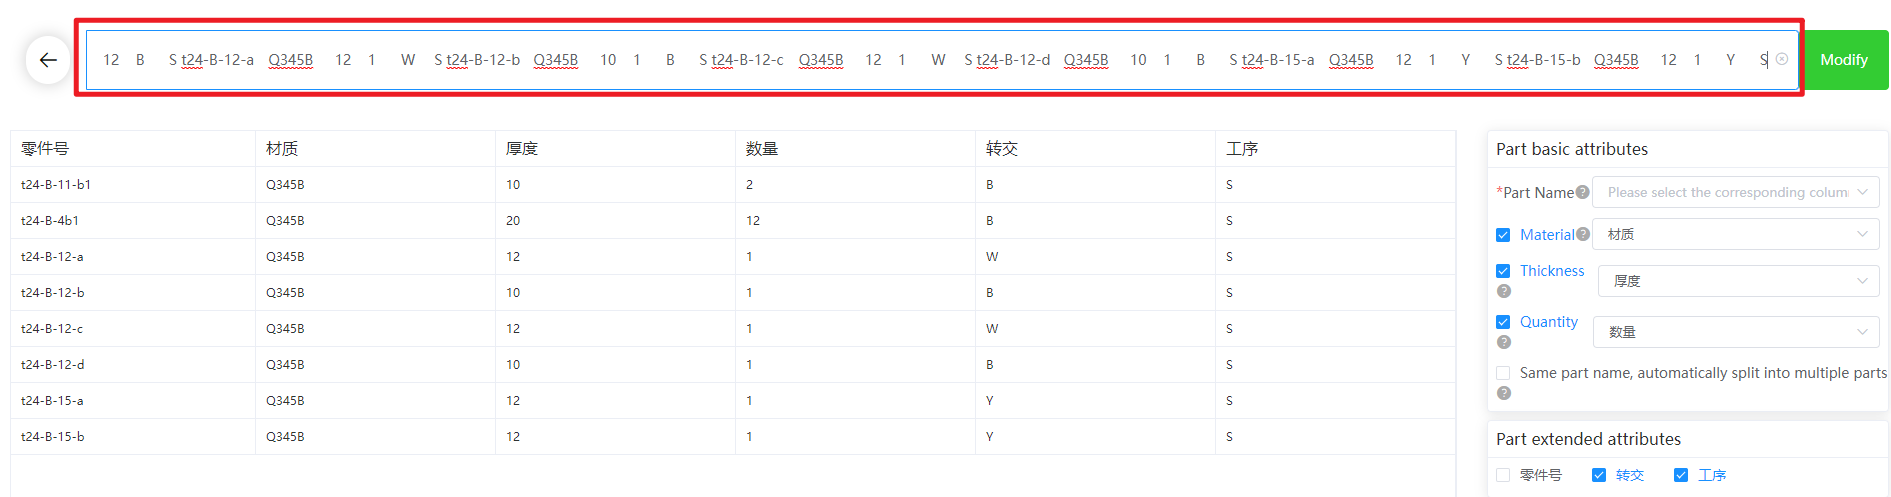
3. Set Part Base Property
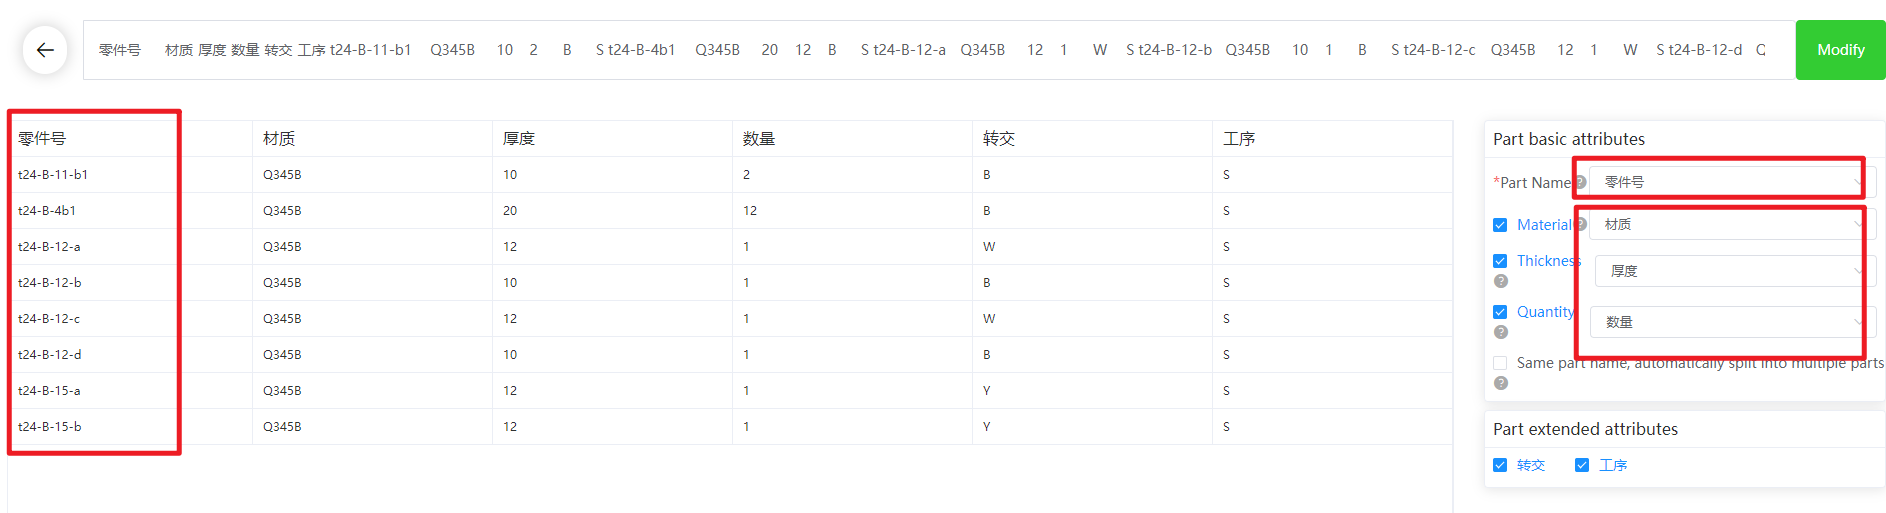
- Click the dropdown box of [Part Name] and select the data column corresponding to 'Part Name' in the table.
- Other basic attributes can be selected according to personal needs
- Select [Same Part Name, Joint By Count automatically split into multiple parts] to split parts with the same name and different expansions.
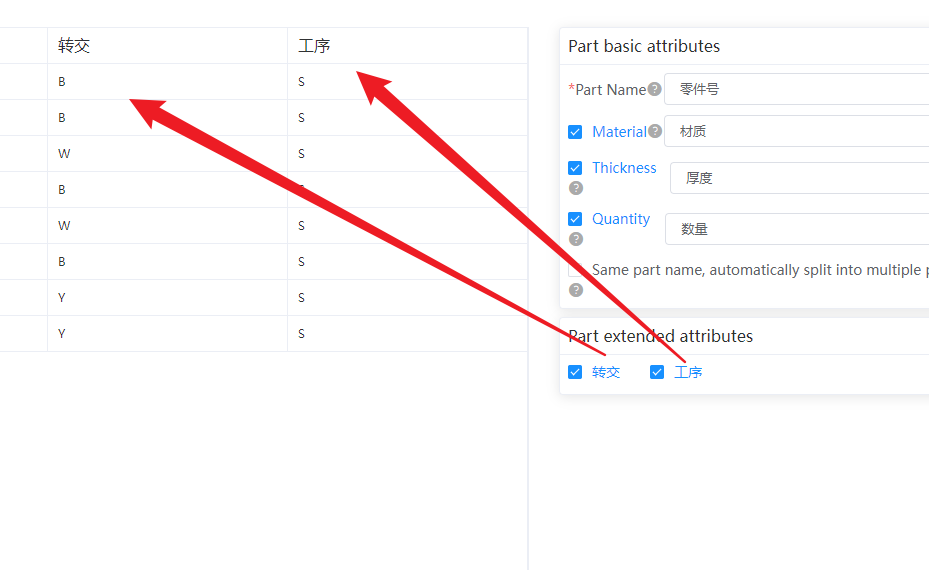
4. Set the part extension attributes
If the part has extension information (e.g., construction, team, etc.), you can select the extension information to be imported together input.
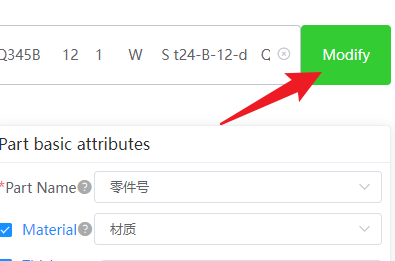
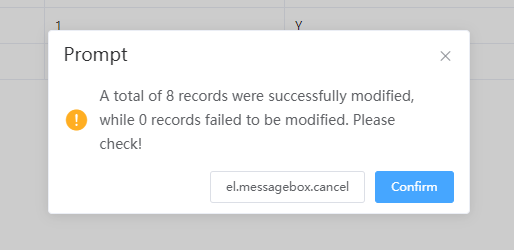
5. Click on the top right corner [Modify] to assign Part information; if there are parts with Import failure, click to check.Check the reason for the failure.
1. Function description
If you have uploaded the part to CloudNest, you need to specify the material and thickness of the part through the Excel sheet degree, quantity, etc. You can use this function to assign relevant information to parts already uploaded to CloudNest.Part Name must correspond to a certain column of information in the table.
2. Operating Steps
1. Click [Add] dropdown list – [Batch Adding part information]
2. Copy the information from the table and paste it into the text box (the header must also be copied!)
3. Set Part Base Property
- Click the dropdown box of [Part Name] and select the data column corresponding to 'Part Name' in the table.
- Other basic attributes can be selected according to personal needs
- Select [Same Part Name, Joint By Count automatically split into multiple parts] to split parts with the same name and different expansions.
4. Set the part extension attributes
If the part has extension information (e.g., construction, team, etc.), you can select the extension information to be imported together input.
5. Click on the top right corner [Modify] to assign Part information; if there are parts with Import failure, click to check.Check the reason for the failure.

