

-
Products
Overview Products

-
2D Cutting
-
Tube Cutting
-
3D Cutting
-
Intelligent Welding
-
Intelligent Cutting Head
-
Industrial Automation
-
Industrial Software
-
Combination
-
Combination
BOCHU New Product -
Combination
BOCHU New Product -
Controller
BOCHU New Product -
2D Cutting Head
Tube Cutting Head
3D Cutting Head
Consumables
BOCHU New Product -
Servo
BOCHU New Product -
Industrial 4.0
-
- Support
- About
- Online Store


- Software Download
- Manual
- Tutorial
- CloudNest
Function description
The parts imported into CloudNest can have text marks through the function of "Batch Add Text Marks", allowing for a free choice of basic or extended information for the parts to be added.
Operation steps
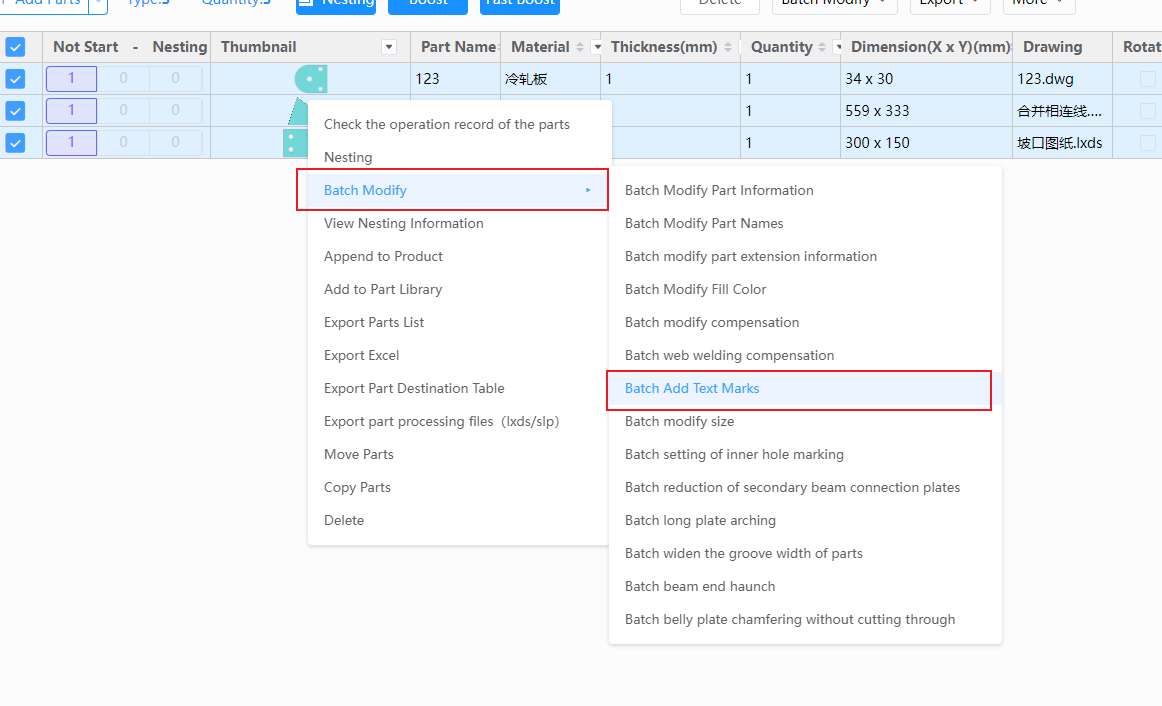
1.【Check】 the parts that need to have text marks.【Right-click】 –【Batch Modify】 –【Batch Add Text Marks】
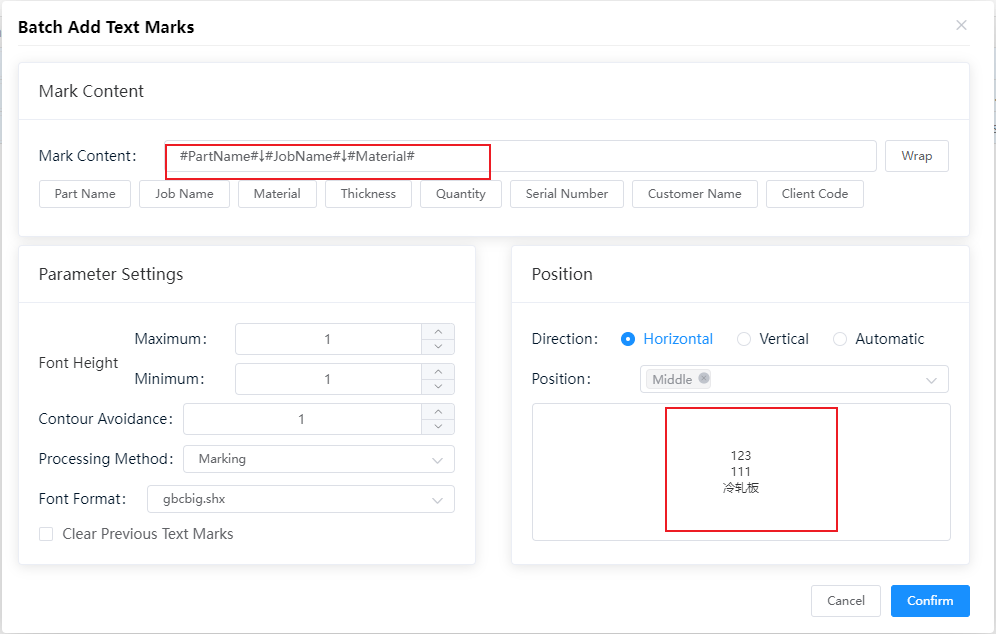
2. Set the content that needs to be added, font size, position, etc.
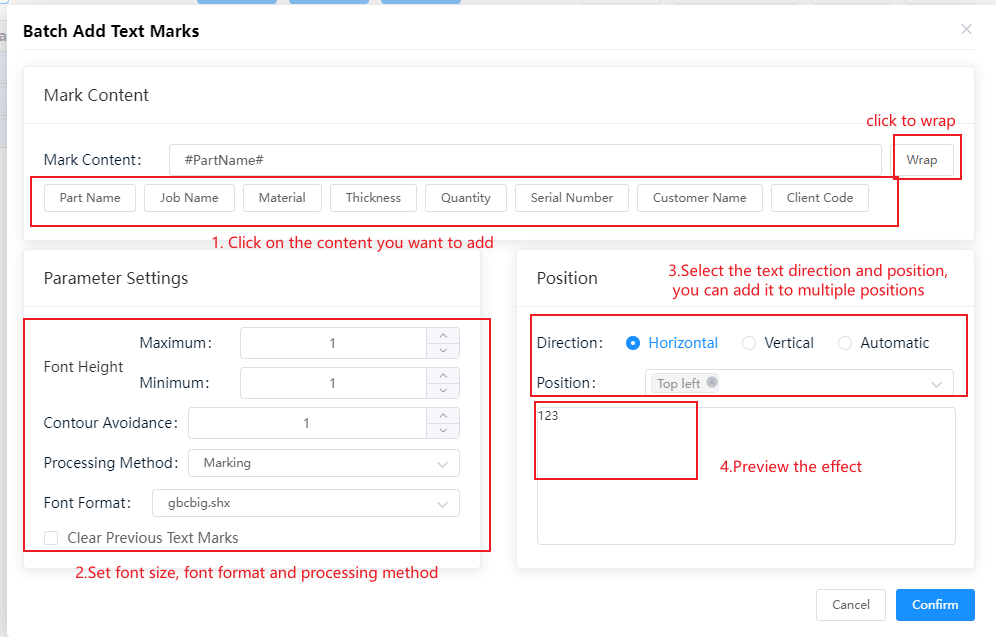
Mark Content: Click on the part information below to add, including basic and extended information;
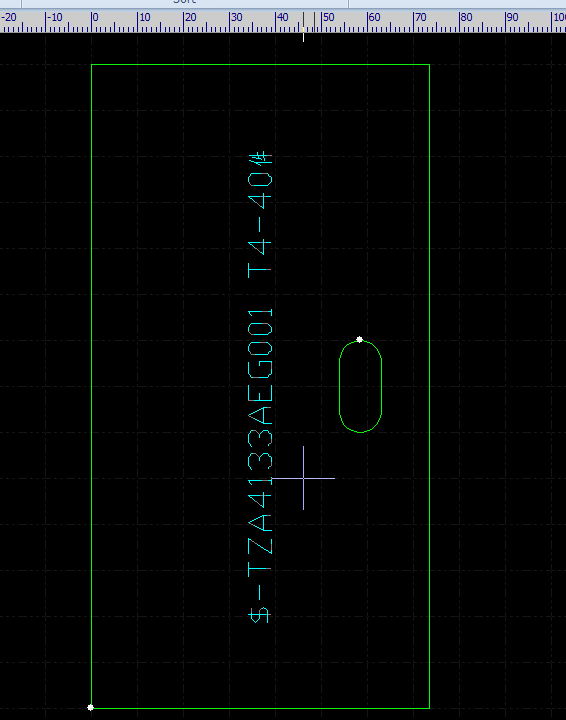
Wrap: The effect of multi-line text can be achieved through wrap (the effect as follows);
Parameter Settings: The software’s selection is default to common font size and optimal font format, and they can be customized as well;
Clear Previous Text Marks: If the part has previously had marking content added and you wish to reset it, you can check 【Clear Previous Text Marks】;
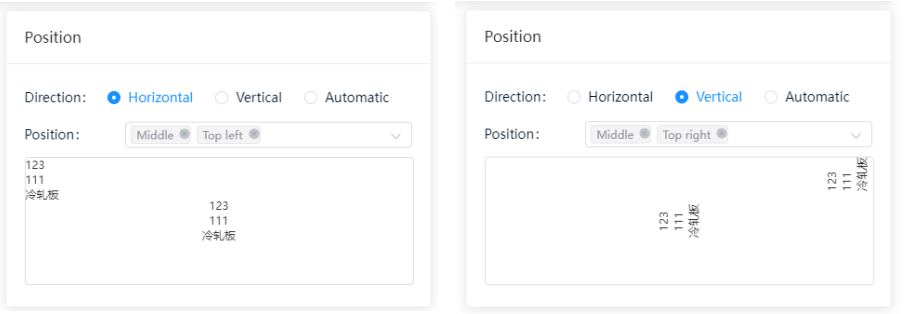
Position: Set the direction and position of the added text (the effect as follows);
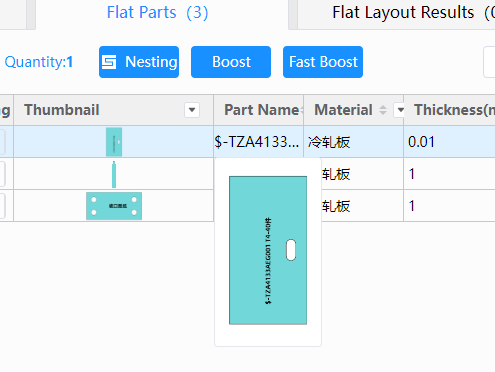
3. When settings are complete, click 【Confirm】; Move the mouse to the Part thumbnail or double-click the part to view the added text marks.
Function description
The parts imported into CloudNest can have text marks through the function of "Batch Add Text Marks", allowing for a free choice of basic or extended information for the parts to be added.
Operation steps
1.【Check】 the parts that need to have text marks.【Right-click】 –【Batch Modify】 –【Batch Add Text Marks】
2. Set the content that needs to be added, font size, position, etc.
Mark Content: Click on the part information below to add, including basic and extended information;
Wrap: The effect of multi-line text can be achieved through wrap (the effect as follows);
Parameter Settings: The software’s selection is default to common font size and optimal font format, and they can be customized as well;
Clear Previous Text Marks: If the part has previously had marking content added and you wish to reset it, you can check 【Clear Previous Text Marks】;
Position: Set the direction and position of the added text (the effect as follows);
3. When settings are complete, click 【Confirm】; Move the mouse to the Part thumbnail or double-click the part to view the added text marks.

