

-
Products
Overview Products

-
2D Cutting
-
Tube Cutting
-
3D Cutting
-
Intelligent Welding
-
Intelligent Cutting Head
-
Industrial Automation
-
Industrial Software
-
Combination
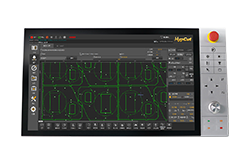
Controller
-
Combination
BOCHU New Product -
Combination
BOCHU New Product -
Controller
BOCHU New Product -
2D Cutting Head
Tube Cutting Head
3D Cutting Head
BOCHU New Product -
BOCHU New Product
-
- Support
- About
- Online Store


- Software Download
- Manual
- Video
- Tutorial
Introduction
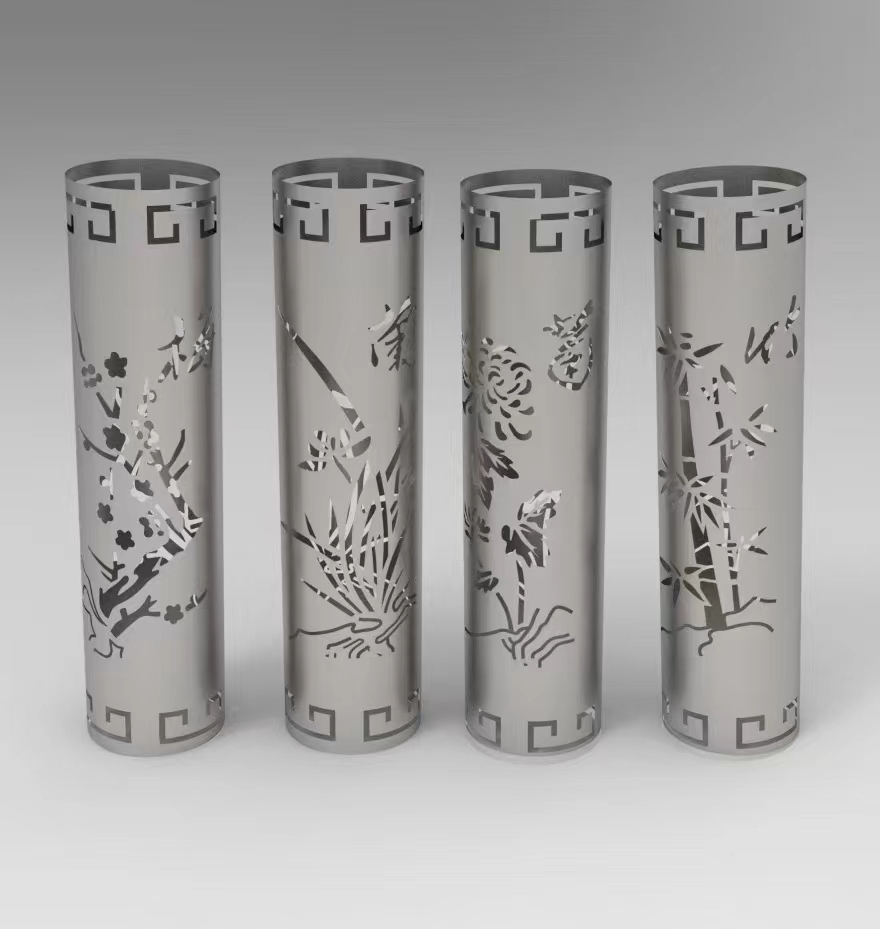
Wrapping is to wrap the graphics around the surface of the pipe as a cutting path, so users can process various patterns, designs, or artistic components on the pipe surface.
For users who are accustomed to using 2D drawings or for parts with complex pipe face features, the flat shapes can be opened in the "2D Editor" interface.
How to do wrapping in 2D Editor
Follow the steps below to wrap a part on a tube.
1.Draw a part for wrapping
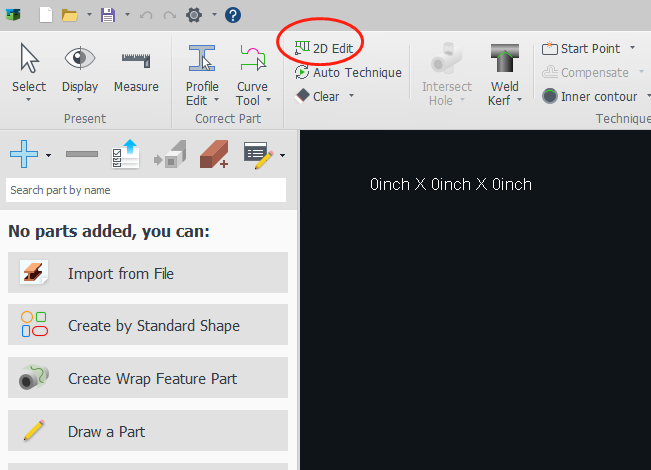
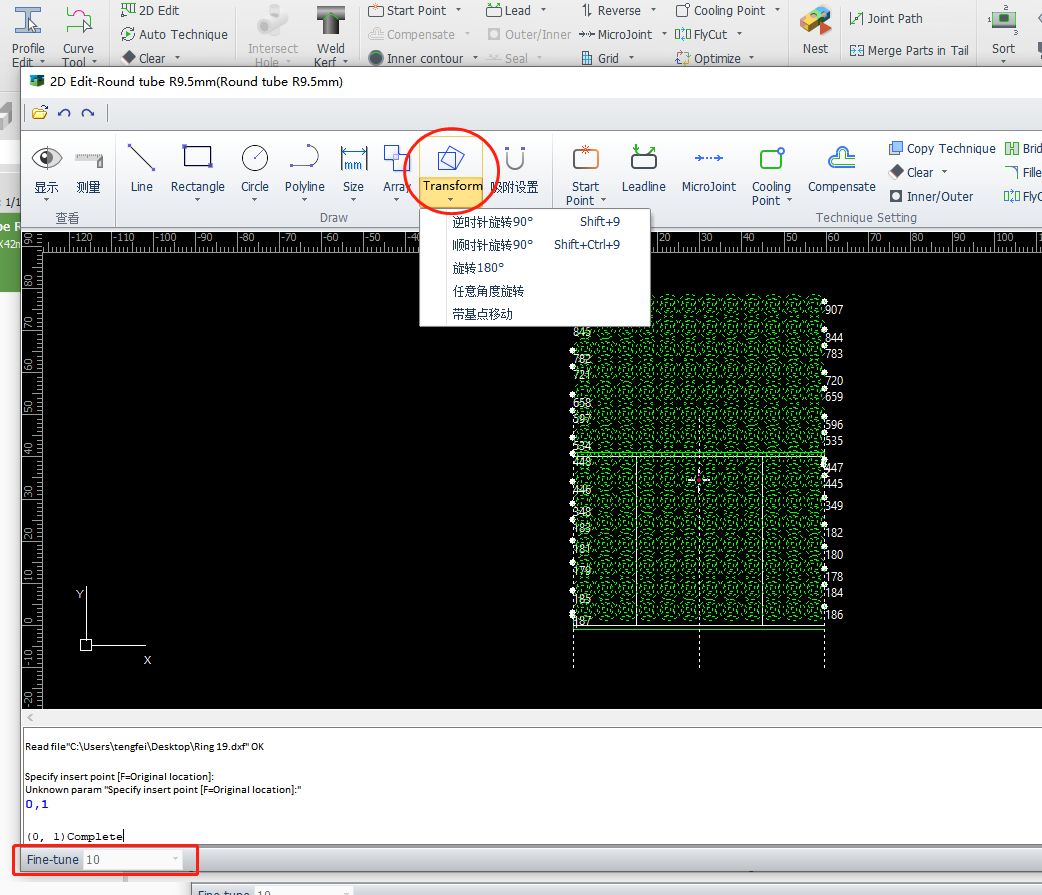
1.1 Click 2D Editor in the Graphics Toobar of TubesT.
1.2 The 2D editor window will be open. In this interface, you can draw common shapes such as straight lines, rectangles, circles, and polylines. Once drawn, you can also perform operations like setting dimensions and creating arrays.
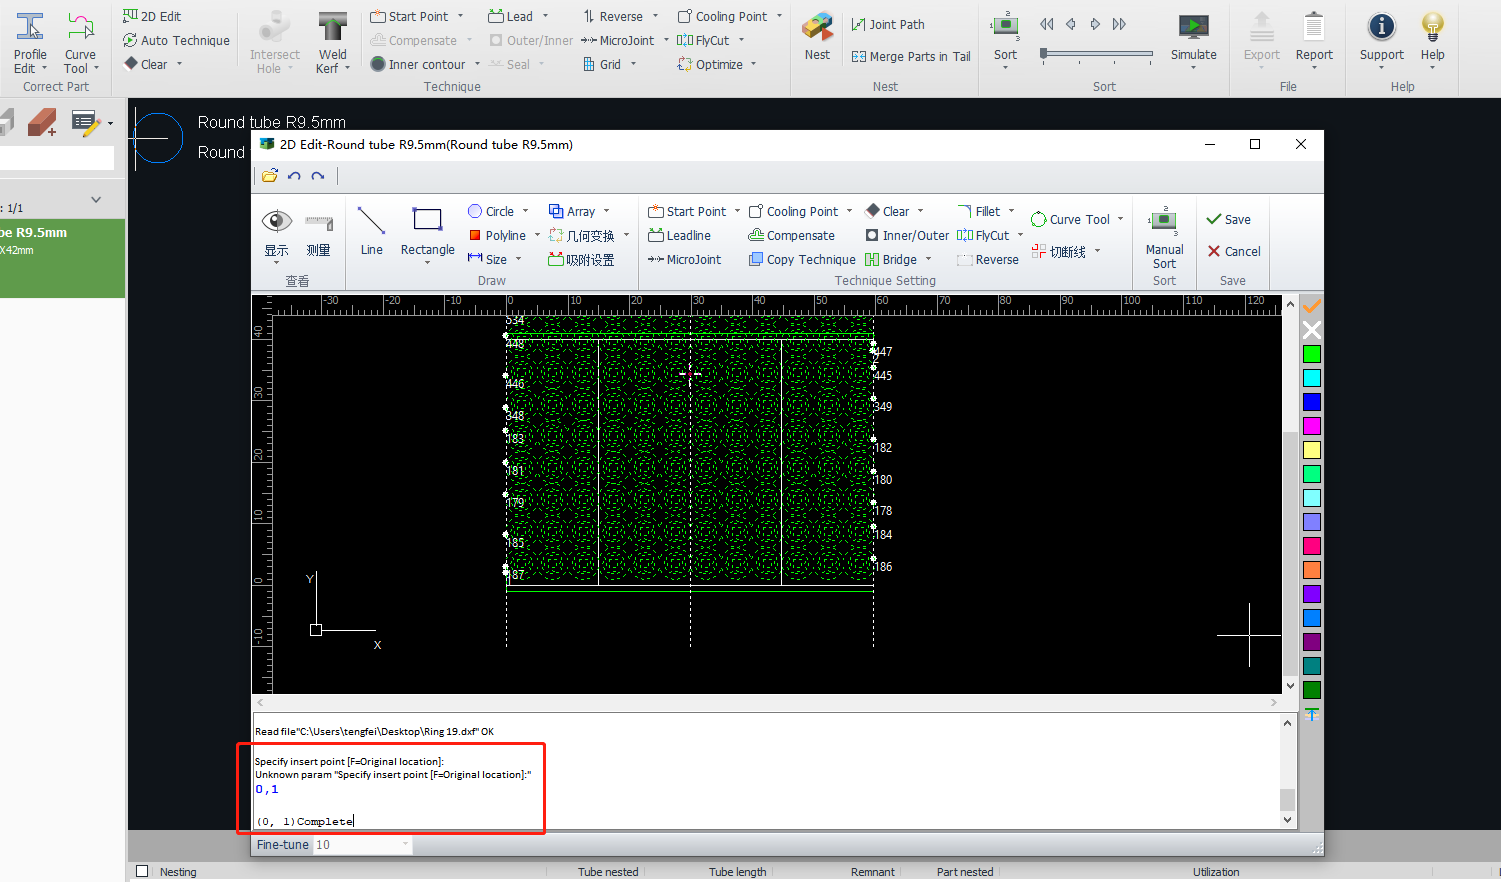
1.3 After opening the drawing file, the 2D plan is currently selected. In the log bar, press the Enter key and enter the XY coordinates (for example: 0, 1) where you want to place the enveloping drawing. Then press Enter again to confirm.
You can also adjust the orientation and position of the shape using geometric tools. You can also use the "FineTune" feature located in the bottom left corner of interface to make precise adjustments to the specific position.
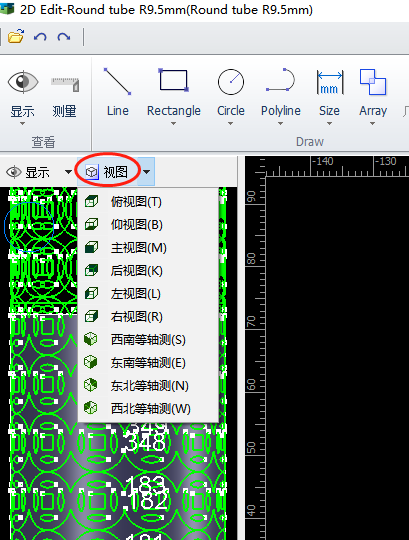
1.4 After wrapping the part, you can view the 3D part view with the wrapping effect on the left column of the interface. You can also use the View functionality to adjust the orientation of the 3D part view.
1.5 After finishing the setup, you can click "OK" and then view the part with the wrapping graphics in the main interface.
2.Add a wrapping part
After clicking on "<Add Wrapped Component>" on the left column, select the cross-section of the pipe that needs to be wrapped. Set the dimensions and choose the DXF drawing file that needs to be wrapped. Once the file is selected, you can proceed to set layer mapping and decide whether to automatically divide the graphics into multiple parts.
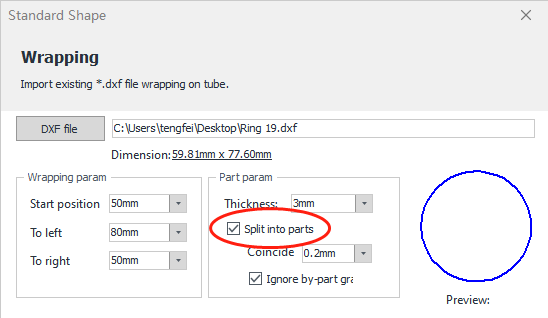
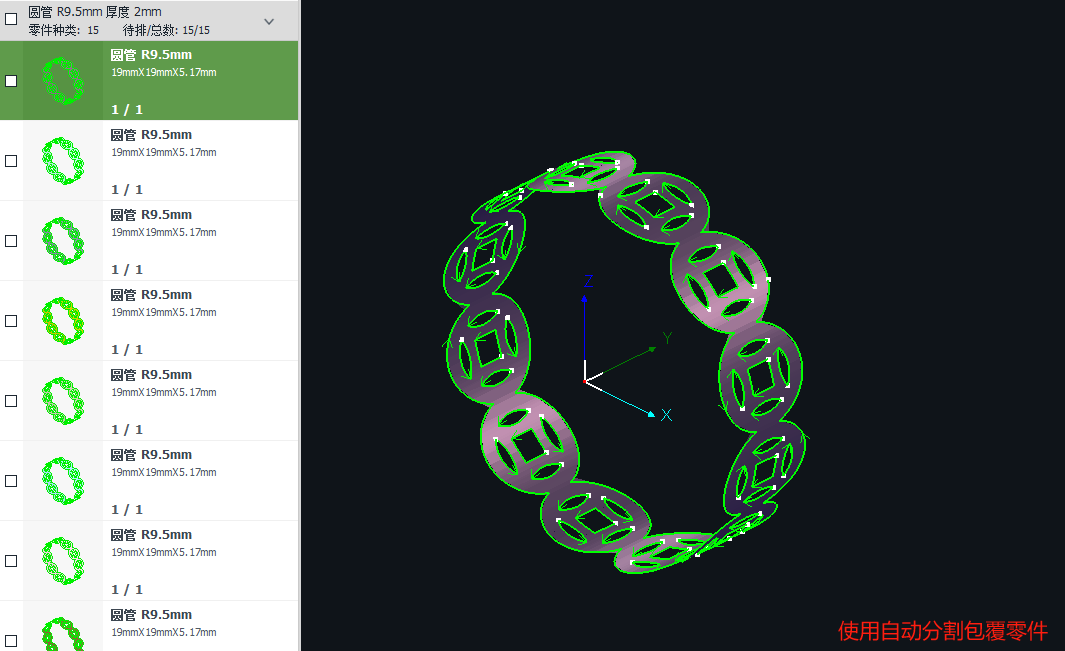
| auto spliting the wrapped graphic into multiple parts | no auto spliting |
 |
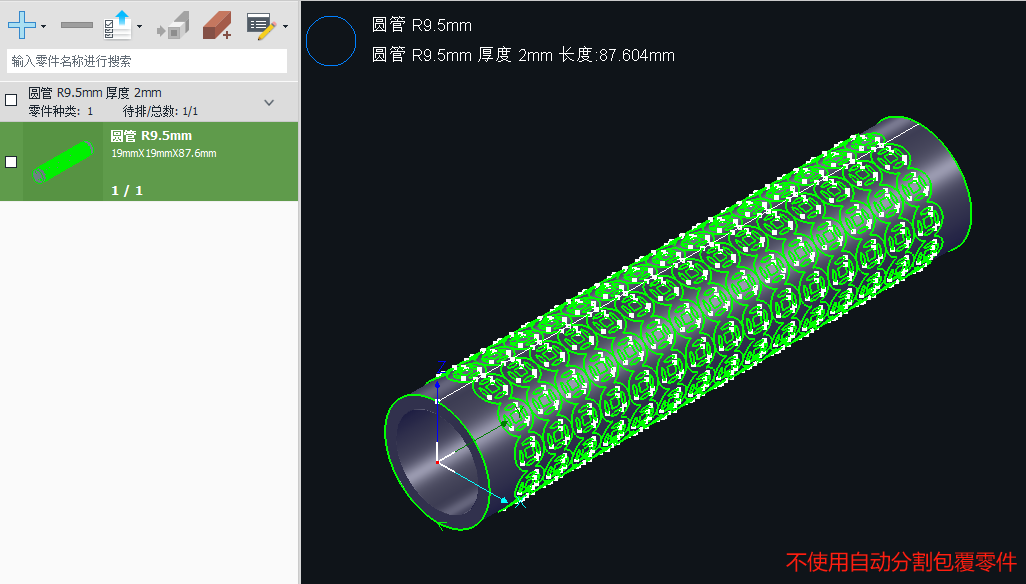 |
Note
- Manually setting the cut lines will trim any excess line segments and fill in any gaps.
- The rendered effect of the wrapped parts will not be updated synchronously, but it does not affect the actual processing and nesting results.
- After setting the cut lines within the 2D editor, the order will not change. To rearrange them, you will need to reorganize them in the main interface.
You can also join the Whatsapp chat group if any question.

Introduction
Wrapping is to wrap the graphics around the surface of the pipe as a cutting path, so users can process various patterns, designs, or artistic components on the pipe surface.
For users who are accustomed to using 2D drawings or for parts with complex pipe face features, the flat shapes can be opened in the "2D Editor" interface.
How to do wrapping in 2D Editor
Follow the steps below to wrap a part on a tube.
1.Draw a part for wrapping
1.1 Click 2D Editor in the Graphics Toobar of TubesT.
1.2 The 2D editor window will be open. In this interface, you can draw common shapes such as straight lines, rectangles, circles, and polylines. Once drawn, you can also perform operations like setting dimensions and creating arrays.
1.3 After opening the drawing file, the 2D plan is currently selected. In the log bar, press the Enter key and enter the XY coordinates (for example: 0, 1) where you want to place the enveloping drawing. Then press Enter again to confirm.
You can also adjust the orientation and position of the shape using geometric tools. You can also use the "FineTune" feature located in the bottom left corner of interface to make precise adjustments to the specific position.
1.4 After wrapping the part, you can view the 3D part view with the wrapping effect on the left column of the interface. You can also use the View functionality to adjust the orientation of the 3D part view.
1.5 After finishing the setup, you can click "OK" and then view the part with the wrapping graphics in the main interface.
2.Add a wrapping part
After clicking on "<Add Wrapped Component>" on the left column, select the cross-section of the pipe that needs to be wrapped. Set the dimensions and choose the DXF drawing file that needs to be wrapped. Once the file is selected, you can proceed to set layer mapping and decide whether to automatically divide the graphics into multiple parts.
| auto spliting the wrapped graphic into multiple parts | no auto spliting |
|
|
Note
- Manually setting the cut lines will trim any excess line segments and fill in any gaps.
- The rendered effect of the wrapped parts will not be updated synchronously, but it does not affect the actual processing and nesting results.
- After setting the cut lines within the 2D editor, the order will not change. To rearrange them, you will need to reorganize them in the main interface.
You can also join the Whatsapp chat group if any question.


