- Products
Product
-
2D Cutting
-
Tube Cutting
-
3D Cutting
-
Intelligent Welding
-
BLT Intelligent Cutting
-
Industrial Automation
-
Industrial Software
-
BOCHU New Product
-
Portfolio
BOCHU New Product -
BOCHU New Product
-
FSWELD2800
BOCHU New Product -
Structural Steel Cutting Head
Plane Bevel Cutting Head
Tube Cutting Head
2D Cutting Head
BOCHU New Product -
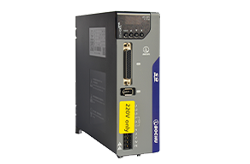
BOCHU High-Speed Servo Drive
BOCHU New Product
-
- Online Store
- Service & Support
- About BOCHU

- Software Download
- Manual
- Tutorial
- CloudNest
Quick Start
- Open "CloudNest" -> Job -> Add, after creating a job folder, right-click on the folder -> Add job;
- Double-click the job, and in the parts list view on the right -> Add -> select the drawing, the drawing can be processed as a part and imported;
- After the parts are processed, select the part to be nested -> click "Nesting", follow the prompts to create a new sheet, and select the sheet and quantity of this nesting;
- In the nesting interface, after automatic nesting, close and save, and return to the job interface. In the nesting list on the right, the nesting just completed will appear;
- You can choose to export files or plan. If you plan, push it to the machine to start processing.
Quick Start
6741view
- Open "CloudNest" -> Job -> Add, after creating a job folder, right-click on the folder -> Add job;
- Double-click the job, and in the parts list view on the right -> Add -> select the drawing, the drawing can be processed as a part and imported;
- After the parts are processed, select the part to be nested -> click "Nesting", follow the prompts to create a new sheet, and select the sheet and quantity of this nesting;
- In the nesting interface, after automatic nesting, close and save, and return to the job interface. In the nesting list on the right, the nesting just completed will appear;
- You can choose to export files or plan. If you plan, push it to the machine to start processing.
-
Email subscription
-
Contact us
-
Download


